Star Wars Light Fixture
A big thank you to my awesome husband for getting behind the Star Wars Inspired room by making this sweet Star Wars light fixture inspired by the Star Wars space ships! Our son is ridiculously thrilled and is so proud of his big boy room! He insists this is an easy light fixture to make and it was totally budget friendly! He upcycled some pieces from a florescent we took out of the kitchen and a few other inexpensive pieces – it was cheaper than buying just about any light fixture available at the hardware store – cooler & cheaper?! win win!
With no further delay – here is the Hubs………………….
Finish off your Star Wars room with your own Star Wars light fixture. This was designed to mimic the style of the first 3 movies. It takes a few steps but is worth the effort.
Most of the fixture is made of primed wood and MDF board.
Materials list…
- Two 24 inch industrial florescent light fixtures. Be sure to select ones that plugs in if you are not able to wire your own electrical lines.
- One 24 x 48 florescent light replacement panel. These are plastic “glass” panels usually next to the lights fixtures.
- One 16″ x 1″ x 8 feet MDF board or pine plank.
- Six 1 x 2 x 8 feet primed pine
- 1/2 gallon of white interior paint.
Step 1: The center and end pieces.
Cut three 12″ x 15.5″ pieces from the 16″ plank
Trim off the corners at a 45 degree angle using the following measurements.
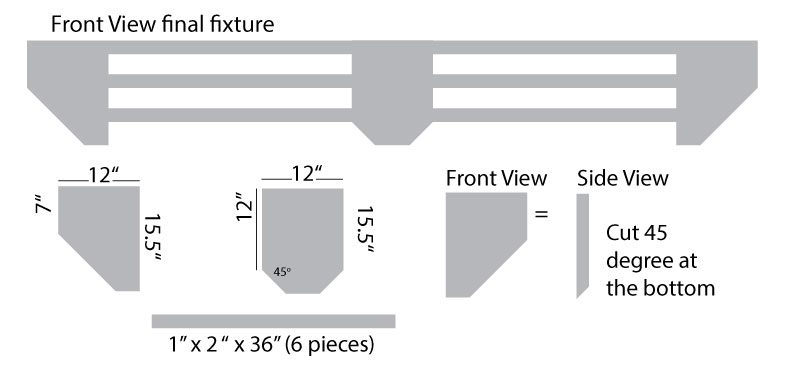
I recommend using a Kreg Jig to assemble your fixture. Its used to create face frames and is the easiest way to assemble this. Click on this photo link to see one on Amazon.com.
If you do not have one, then use some scrap 1 x 2 on its side. Glue and pin these pieces to the cross bars. See the next image for an example.

Set these pieces aside. You may want to go ahead and paint these now so they are drying. Now lets move onto the brackets and mounting instructions.
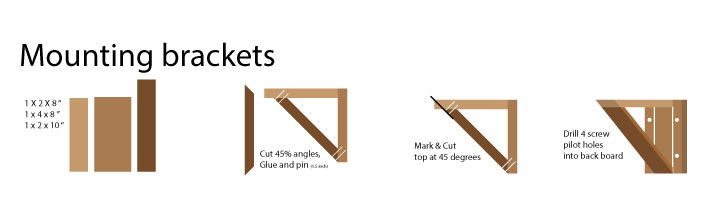
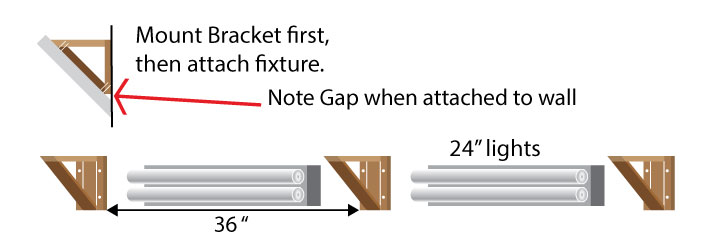
Step 2: The mounting brackets
Here are the plans for the mounting brackets. Use a chop saw to cut these down to size and the 45 degree corners. Keep in mind that the back piece is 4″ wide while the top and angle pieces are 2″ wide. Use wood glue and a pin gun. Using screws on small pieces of wood usually cracks them. If you do not have any other choice, be sure to drill pilot holes first and counter sink where to screw heads will be.

These were made the from all 3″ wide pieces and were difficult to attach to the wall. The instructions above should help you avoid the challenges I had with mine.
Step 3: Mounting
Be sure to measure and space things correctly to insure that everything will fit correctly. Mount your lights first, then the brackets, then the fixture. Use screws to attach the fixture to the bracket. Cover the screw holes with spackle, wood hole caps, or use hex bolts for a more industrial look. TIP: Check to be sure the lights will be covered by the panel and do not stick up over the top of it.
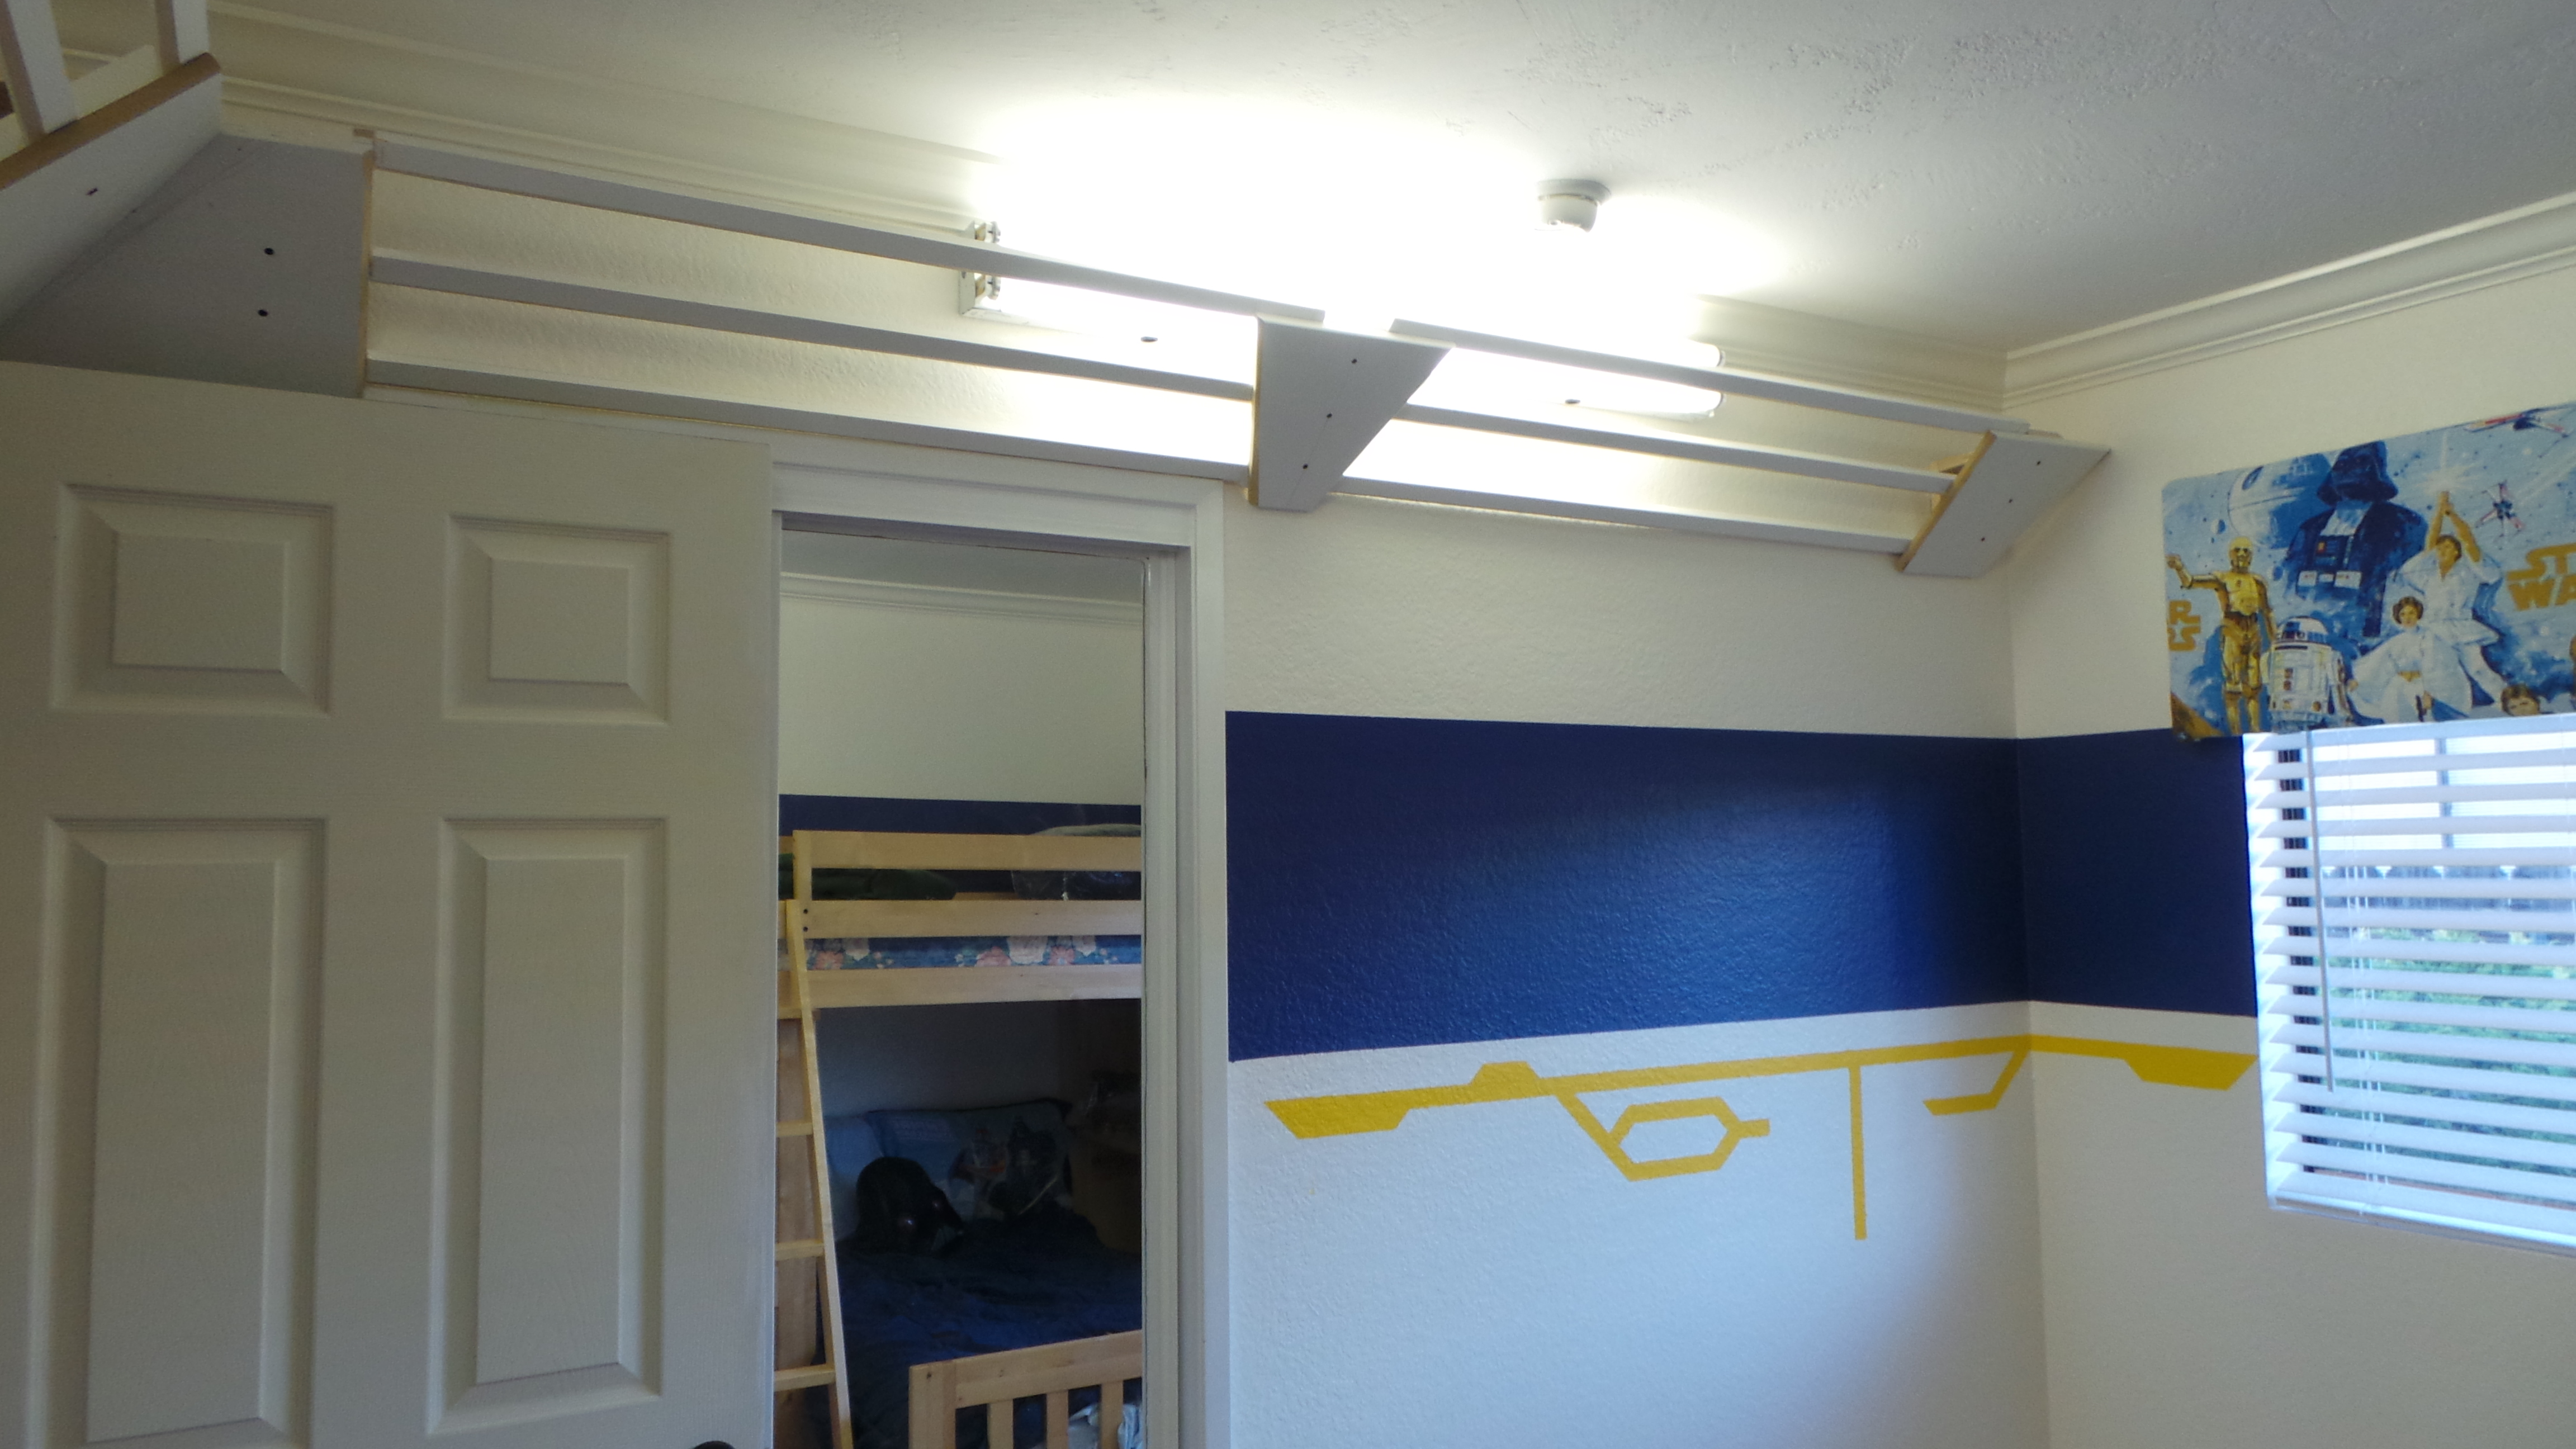
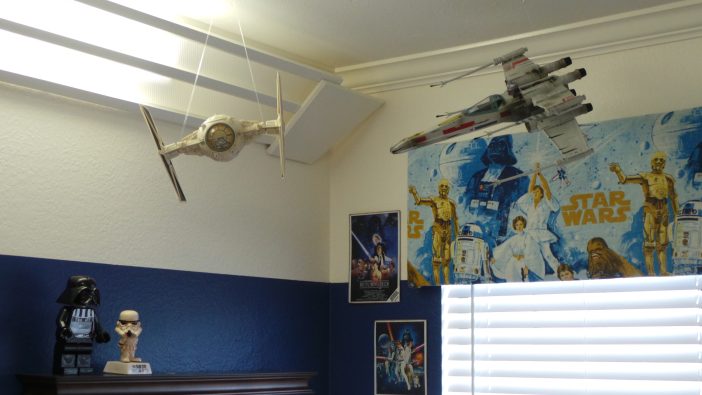
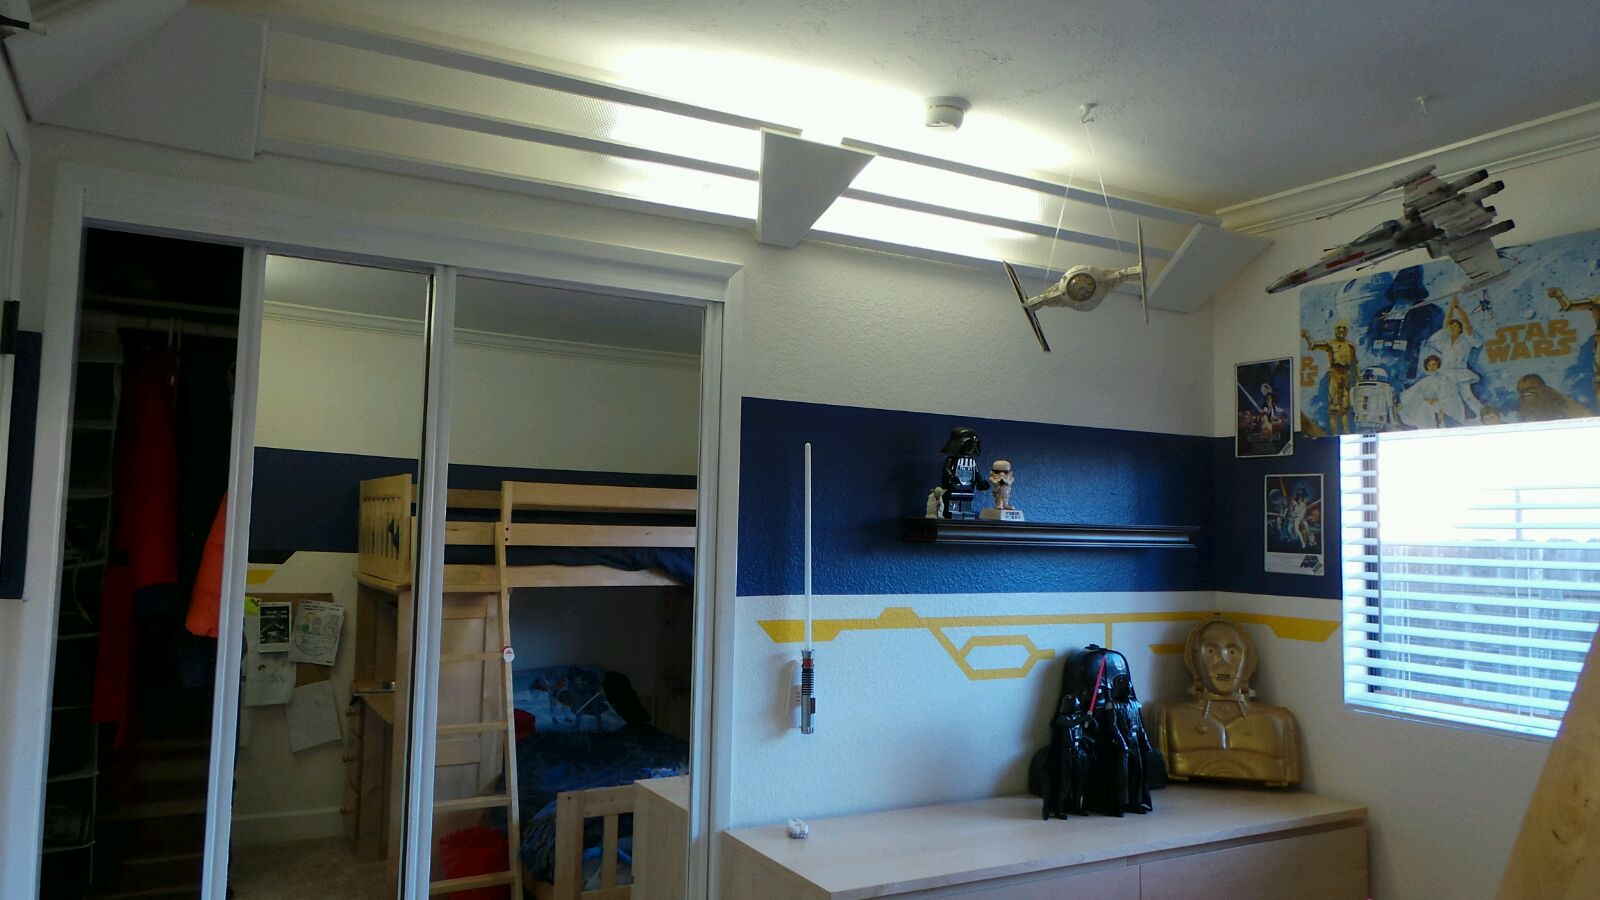
In our room, I created two sets of the lights. Using a compound miter saw, I created the corner piece like crown molding. As you can see, we chose to use 1 fixture in the middle of the wall. You can also mount and assemble the fixture as it goes up. Make sure you have enough space the slide everything in.
Step 4: Add the light panels.
Cut your light panels down using a new utility knife or razor. Clamp down a straight edge on the cut line. Push down hard and try to cut through it in 1 pass. Slide them into place once your fixture is in place. Add 2 small screws to the bottom cross bars on the inside if your panels fall through. It should slide down all the way to the wall. Wait until you have your light fixture in place to cut the panels. This insures your panels will fit correct.
In our room, we made 2 sets and hung them on 2 walls. My other idea was to make a wall of lights like the ones in the Death Stars.
Option 2 : Death Star style lights.
These are easier to make. Make a frame using 1 x 8 x 60. You could go all the way up the wall if you like. Make rectangular frame. You may want to mount 1 x 2’s to the wall, then attach you 1 x 8’s to it. Mount you lights inside the frame onto the wall. Make sure there is an outlet inside the framed area. Wire all the lights together and plug it in.
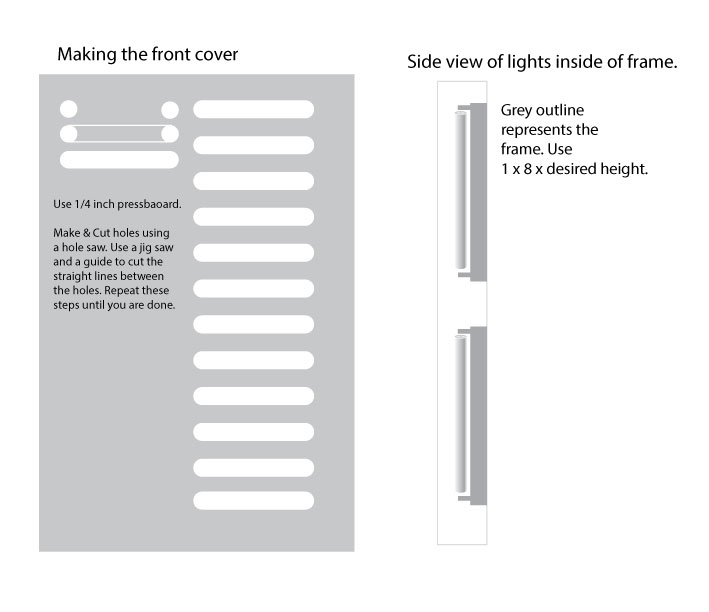

The cover is on the right. This is made of 1/4 in pressboard. 4′ x 8′ sheets are available in most lumber stores. Use a hole saw to make 2 holes, then use a jug saw to cut the straight lines inbetween the holes. Repeat this over and over until you make the full panel. Measure, mark and space things out first. When you finish, use a finishing sander to smooth everything off. Prime and paint it white.
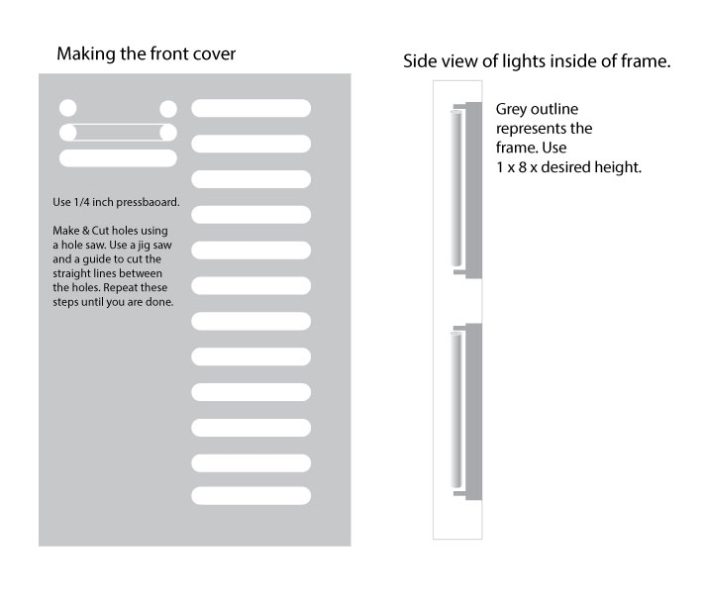
Measure how far out your lights will stick out from the wall. If you get low profile lights, you can use smaller wood. You may even be able to use 1 x 4 and save money. Attach some 1 x 2’s to the inside of the cover for support. Depending on how tall you make it, you may want some crossbars too. To attach, slide the cover in place and attach with screws at the top, bottom, and sides. See the image below.

Many rooms have 1 outlet connected to the light switch. Use this switch if you can. If not, plug in lights have a toggle switch to turn them on. Leave the switch exposed near the bottom to turn on the lights manually.
Want to check out the finished star wars light fixture with everything else? His Star Wars Room is kinda the room of his seven year old dreams! We also have a Star Wars Inspired DIY Paint Techniques Tutorial too!

If you make some of these, please share your picture with us. We would love to see them.


Love the lights
Cute room!
Hello
My son like have a Star Wars bedroom. I like to know what is yellow line, what is called and where you see that from Star Wars?
look forward to hear from you.