LEGO Thor Costume : DIY Instructions
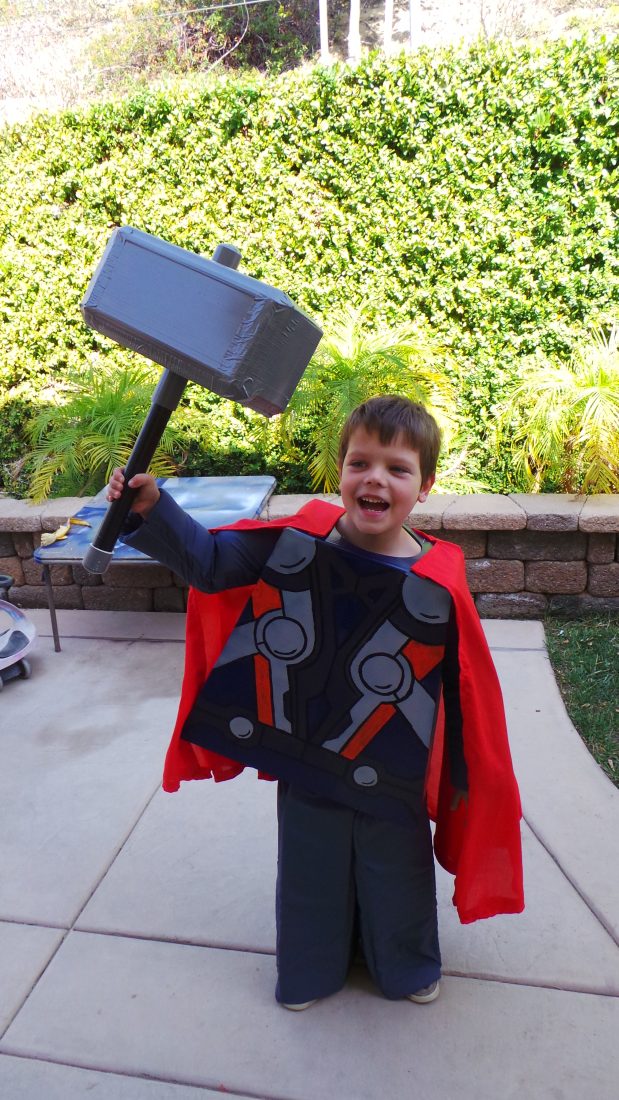
Marvel is a family favorite for Halloween Costumes. One year, our son won a LEGOLAND costume contest with this LEGO Thor costume! We have included instructions on how to make your own DIY LEGO Thor costumes in this article. Step by step instructions on this easy and inexpensive DIY super hero costume. Make Thor and a his hammer from home.
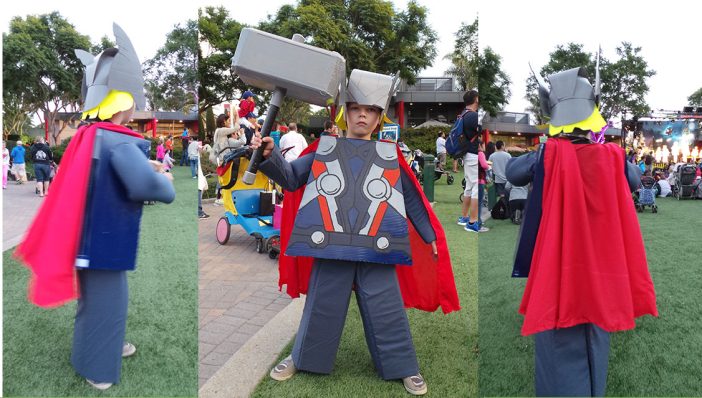 So our son is kinda into LEGO….. like a lot. He is also into Superheroes. One of our favorite family traditions during the Halloween season is to attend Brick or Treat at LEGOLAND California. This year we decided to participate in the costume contest for the first time, they have three different categories – one being “LEGO Theme”. Our son went rounds about what to be – and he decided that since Thor is coming to theaters in a matter of weeks he just had to be LEGO Thor! I must admit – we aren’t huge ‘do it yourself’ kinda people – in theory it sounds so fun, but we rarely finish a craft. Daddy promised S that he would make him a LEGO Thor costume this year and it was EPICALLY cute. We got so many compliments and he won 2nd place! (you should have seen the kid that was LEGO Iron Man that won 1st – it was amazing – like possible professionally made.) While our LEGO Thor costume was not easy to make, it was really something anyone can do and it cost just under $40 to make. I sweet talked my hubby into writing instructions for anyone who might be interested in making a LEGO Thor costume – keep in mind you could apply this costume to any number of “LEGO guy” themed costumes!
DIY LEGO THOR COSTUME
The following should be used as a starting point for a LEGO Thor Costume. Be sure to measure out your child and adjust accordingly. Listed are the materials first. Below are the instructions. You can click on each picture for a closer look.
 Materials: Upper Body
 Materials: Upper Body
- Coroplast 72″ x 36″ (This is plastic cardboard from Home Depot or your local hardware store)-Cardboard may work too.
- Gray Material for sleeves (Pillow case works nice or material you have laying around)
- Blue material for pants ( I used a blue twin size sheet)
- Red Material for the Cape
- Thin Carpet padding or foam ( 2′ x 6′)
- Primer spray paint for plastics (for the coroplast- Spray paint will take days to dry otherwise.
- Blue Spray paint
- Acrylic paint for Armor detail
- Peal and stick Velcro squares
- Duct Tape
- Belt
 Hammer
 Hammer
- 2″ PVC pipe 3 foot long
- 2″ PVC Cap (2 of them)
- 2″ PVC coupling
- Coroplast Hammer Template
- Electrical Tape
Helmet
 Helmet
- Old baseball style cap
- Grey poster board
- Yellow poster board
- Coroplast Wings for helmet
LEGO Thor Costume Suit Directions
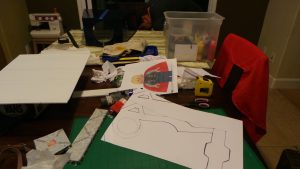
- Draw template onto Coroplast and cut out. Be sure to use a cutting board so you do not cut or scratch the surface you are working on. I recommend a large T-Square and Razor knife.
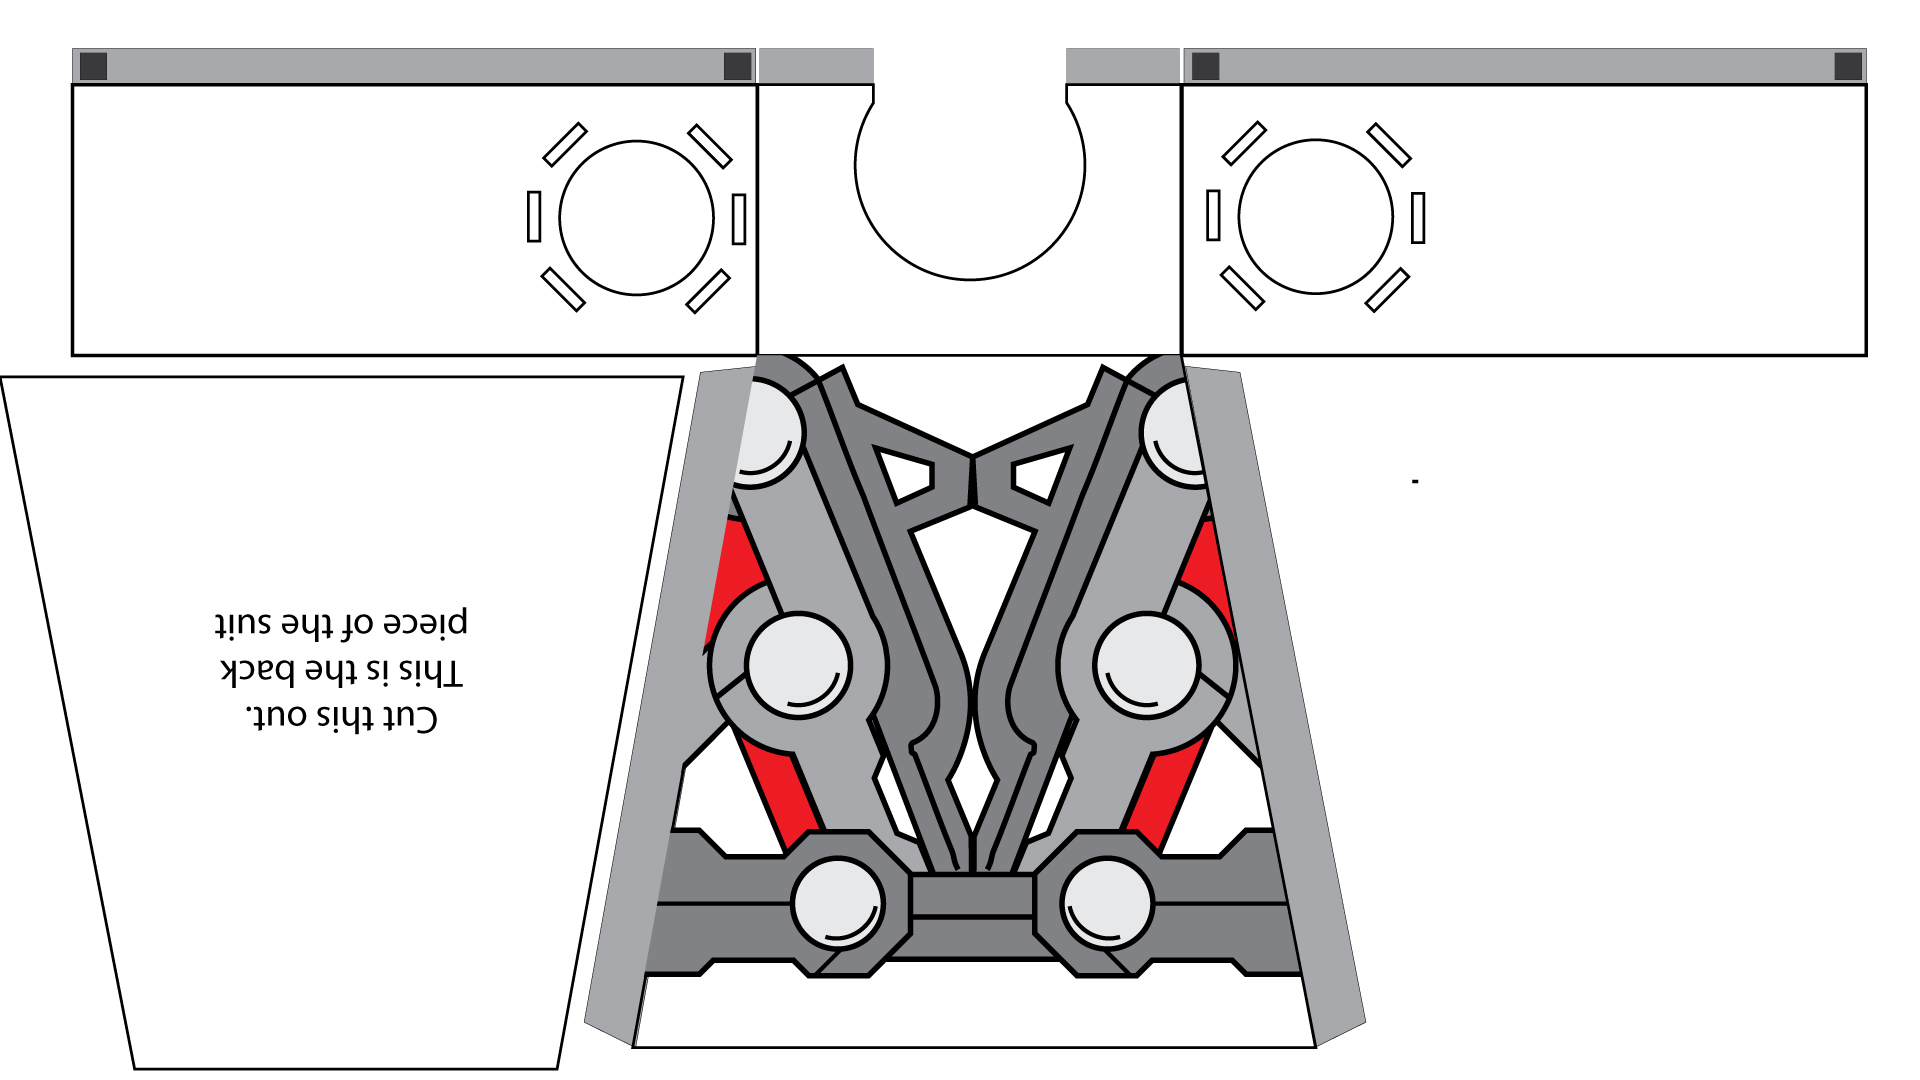
Upper Body
- Front is 11 inches wide and 18 inches tall. The sides are 7 inches wide and 18 inches tall.
- Back tabs are 2 inches (shown in grey)
- Score the fold lines. (TIP) Instead of scoring, Cut the halfway through the Coroplast instead of scoring. Cut out a strip 1/8″ where the fold will be. Do not cut all the way through. Trust me, this will make it a lot easier to work with.
- Fold and duct tape on the inside for reinforcement. Grey Tab edges go inside and are for taping.
- Add 4 Velcro squares to the back tabs.
- Add 4 Velcro squares matching pieces to the back piece.
- Use electrical tape to line the neck hole so as to not scratch your kids neck.
- Cut out the arm holes. The slits are where the sleeves will attach. They feed through and velcro on the inside.
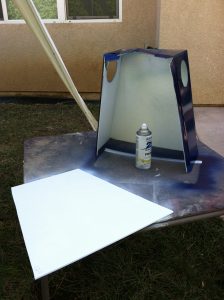
- Prime the upper body and let dry
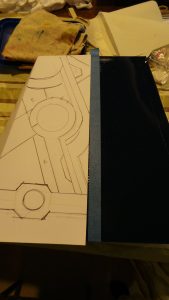
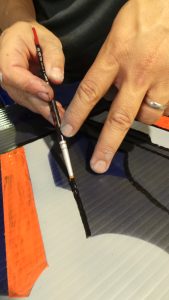
- Spray paint the upper body blue. The template is shown in white but should be painted blue. Then paint the details on it.
- I copied the design onto several 11 x 17 pieces of paper and cut sections out to use as stencils for my airbrush. Then I hand painted in the lines using a brush. You can also have the design printed on self adhesive vinyl but that was out of our budget for this project.
 Cape
Cape

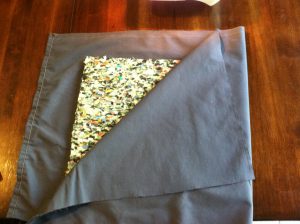
- Draw template onto fabric and cut out.
- From the middle top, the diagonal lines are 3 feet long. These are measurement lines only. I did not draw them on my template. Do not cut or sew these.
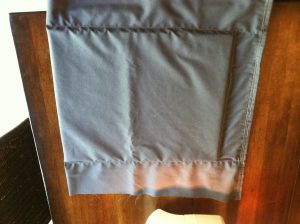
- Fold and Iron the seams (outside edges)
- Sew the seams using a sewing machine so the cape doesn’t fray.
- Add Velcro Squares to cape and top of Upper body.


Set that aside and move onto the next part of your LEGO Thor Costume – The pants and arms.
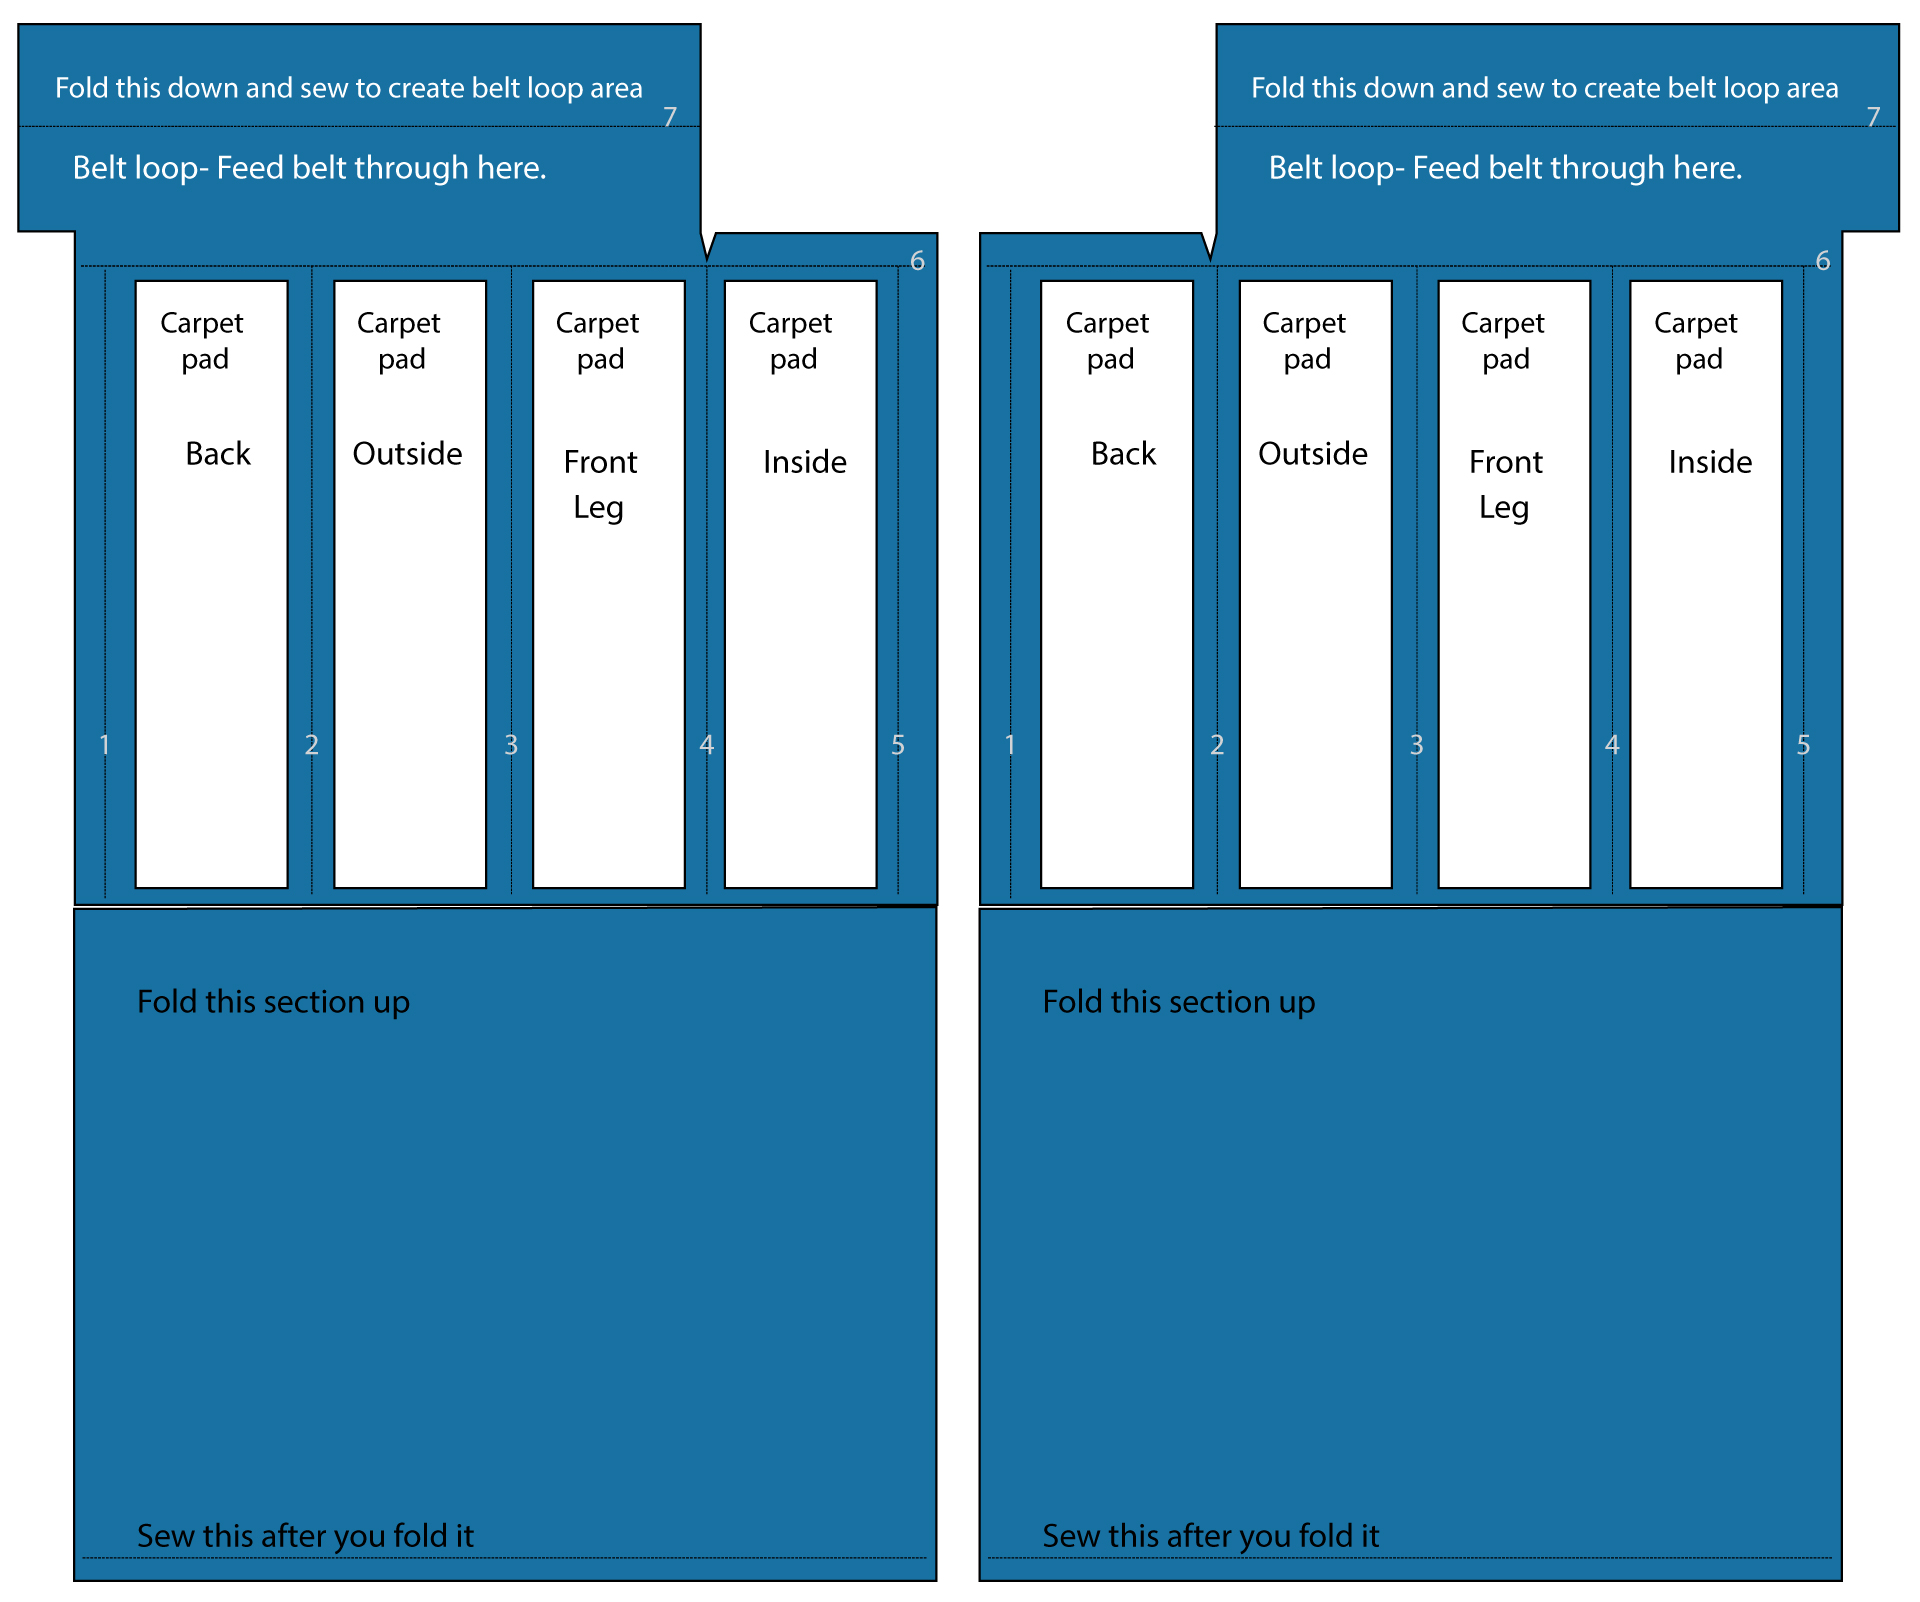
Pants
- You may want to make a paper mock up of the pants template first. Think “Box” tubes.
- The carpet pads are 4.5″ wide by 18″ tall. Adjust these sizes to your child’s measurements. You will need 8 of these.
- The belt loop area is 3 inches done. (6″ tall unfolded)
- Draw the pattern onto your fabric and cut. Give yourself 2 inches all around edges.
- Fold bottom half of material at fold line and sew pockets for padding.
- Sew in numerical order. Sew line 1, add page, line 2 add pad, etc… (Click on picture to see the number order)
- Use padding as edge and sew in place. Sew as tight as possible between pads. Leave 2 inches on outer edges to sew together.
- Repeat the whole process for other leg.
- Sew the inside edges of each pant leg together. That is the area above the word back in my picture.
- Sew the back then the front except for the belt opening and loop. The back is the vertical edge of the belt loop area above “front leg”. Sew the left leg to the right leg. The front should be sewn only half way down (the upper half of the belt loop area only.
- Fold top and sew Belt loop. Be sure to leave the front open to feed the belt through.
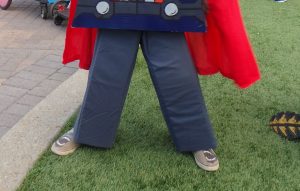
- Turn pants inside out. This is a difficult but can be done.
- Add belt and check lengths.
- Optional, Make Lego feet. You are on your own for this. I ran out of time and did not do this. Make a box with no back or bottom. Leave a seam and sew onto bottom of front leg.
 Arms
Arms
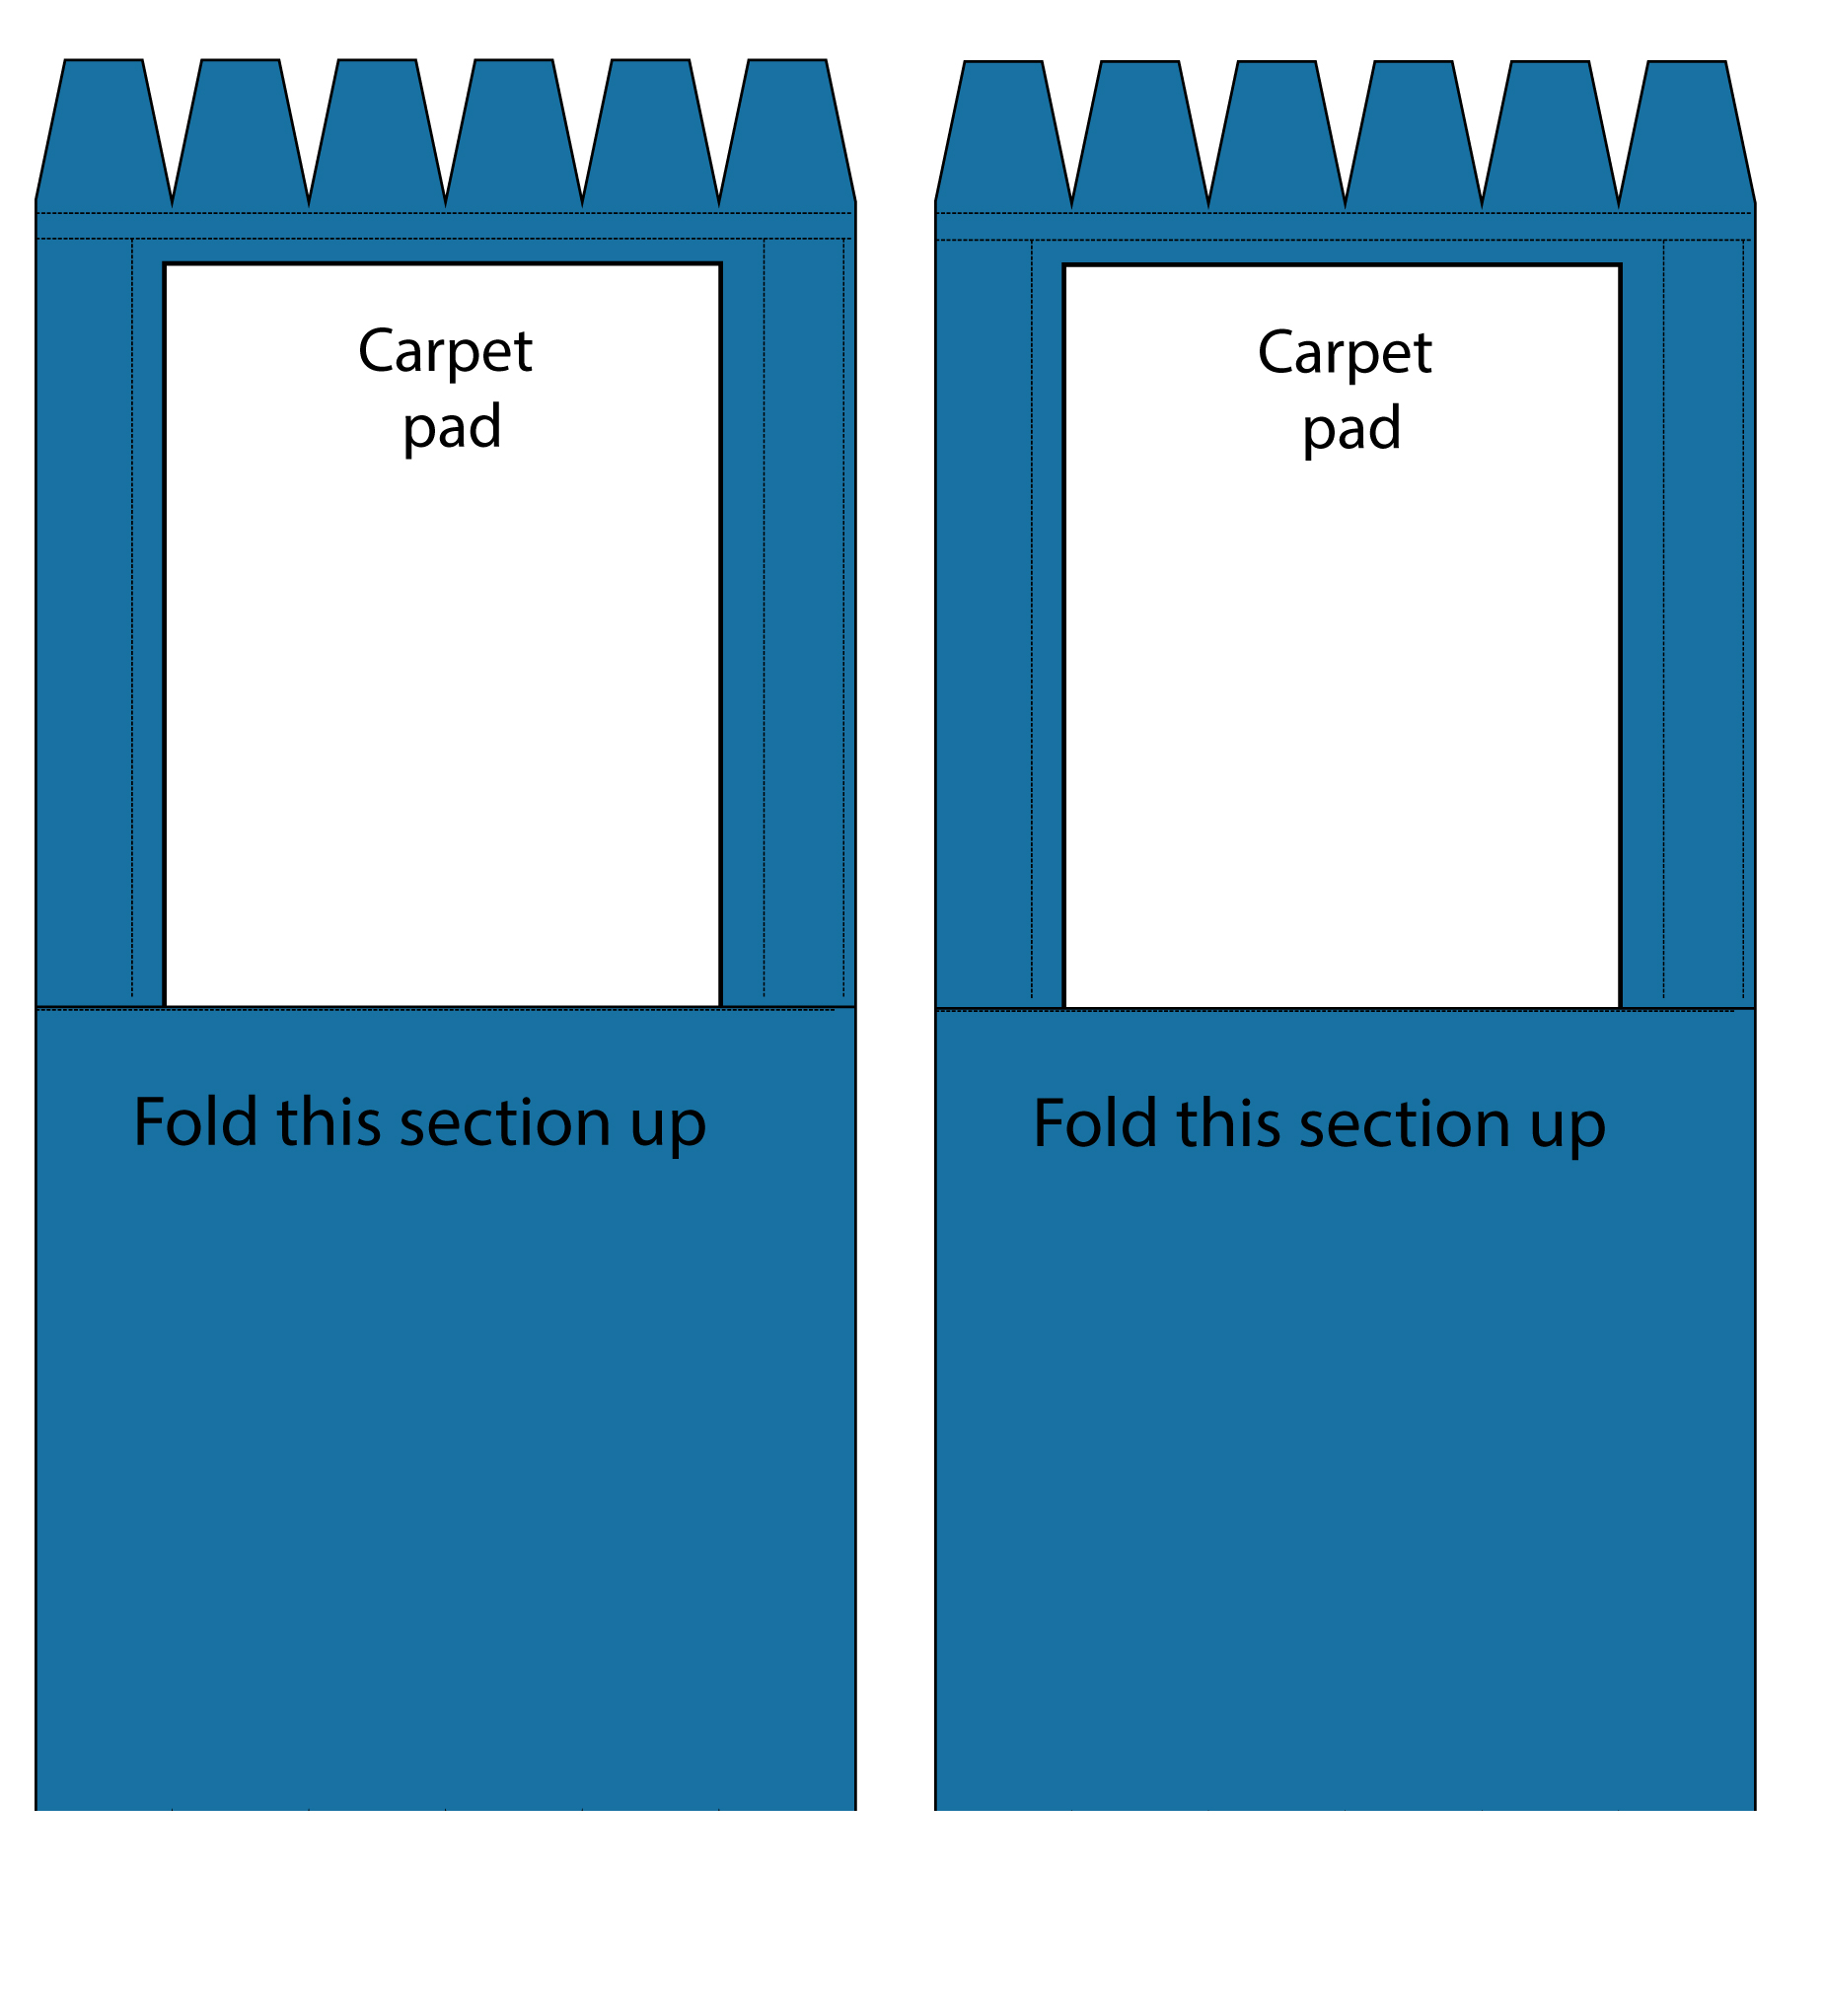
- Copy template onto fabric and cut out.
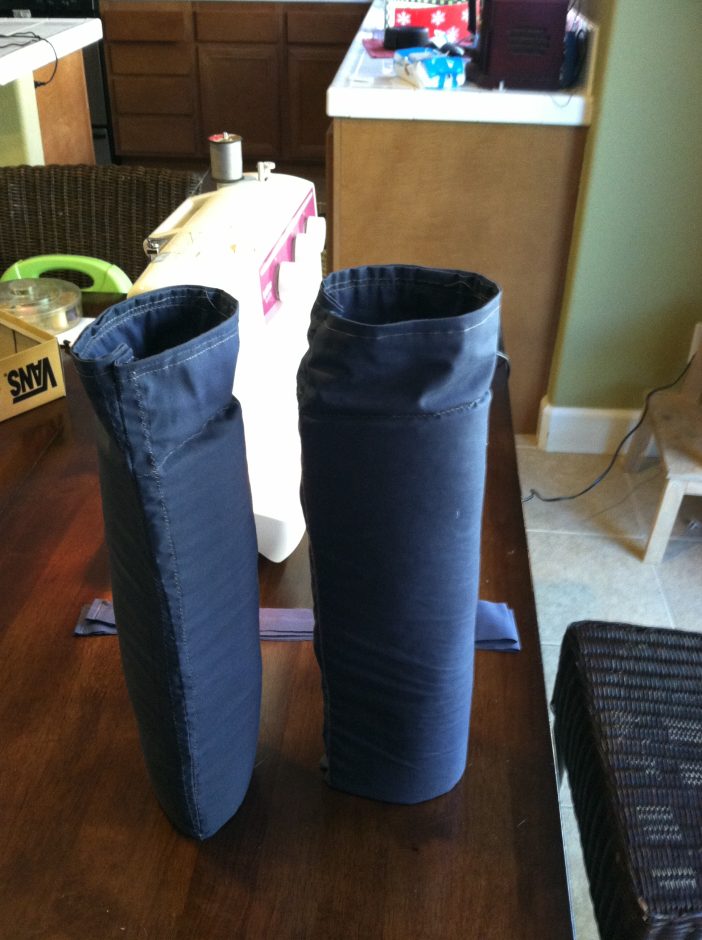
- Fold fabric in half and sew one edge.
- Slip in padding and sew opposite edge
- Sew the top shut over the pad so it doesn’t fall out.
- Sew edges together to make a tube.
- Turn sleeve inside out
- We will feed the 6 tabs through the sleeve slits on the upper body, then add the Velcro squares to hold them in place. add the other side of the velcro squares to the insde of the upperbody. You may need to sew the edges of the tabs if they are fraying. The picture below shows my version without the tabs. I had to cut tabs into it to make it work. I modified the template for you.
Obviously your LEGO Thor Costume is going to need a Hammer……
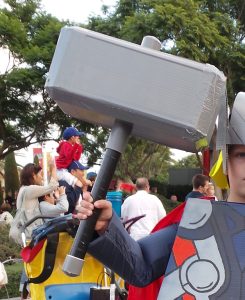
Hammer Directions
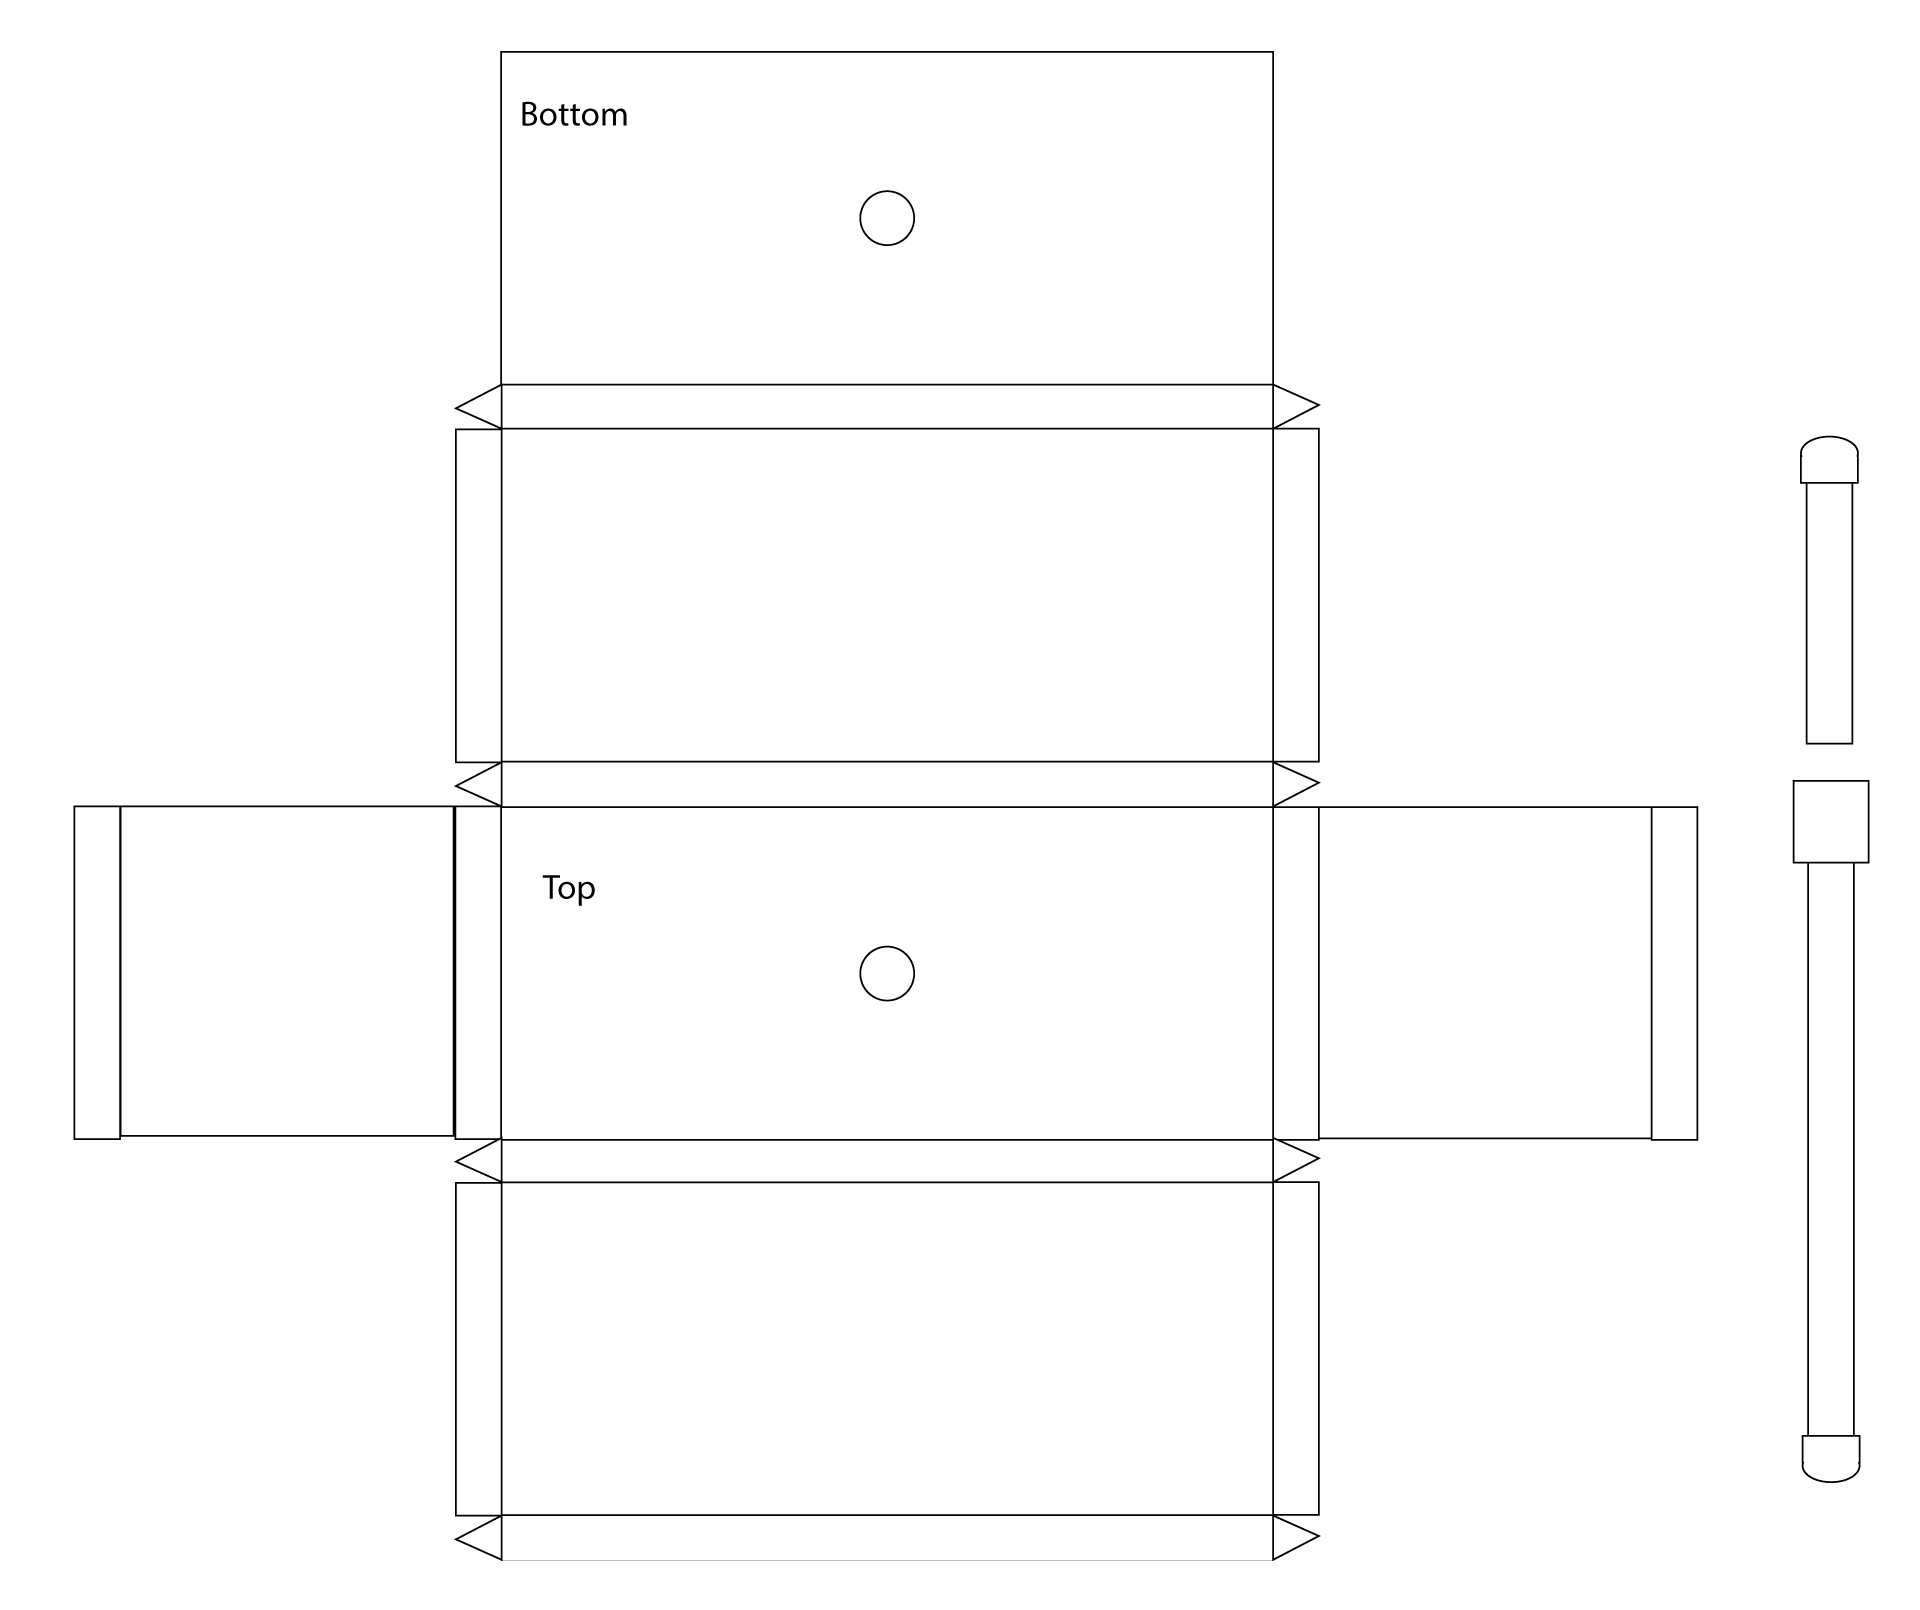
- Cut out template from Coroplast. The base is 4″ x 12″. The height is also 4″.
- The sides taper. Each is 1″ wide. (tip) Make a paper mock up first.
- Cut PVC pipe to 12 inches.
- Place end cap on bottom of PVC pipe and Coupling on other end.
- Add 10 inch PVC pipe to coupling.
- Trim and fold Coroplast Template. (See Coroplast cutting tip)
- Tape together using duct tape on the inside of the template. Use large pieces of tape and secure well. Taping from the inside is preferred. You can tape from the outside, but it does not look as good.
- Slide hammer through the holes onto PVC stopping at the coupling.
- Secure in place by adding a PVC cap on top. You may have to cut your PVC pipe down if it sticks out the top too much.
- Spray with Primer and let dry.
- Spray paint hammer grey.
- Wrap handle with electrical tape.
The hammer is a little tricky to tape together. I left on side open until the end. The next page has the instructions for the helmet.
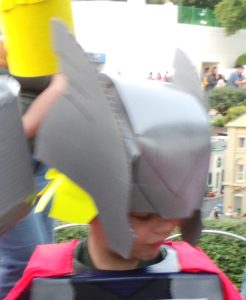
Helmet Directions
 Use the template to create your helmet on Grey Poster board.
- Use a baseball style hat and measure the opening around. Divide by 4.
- Make 4 equal measurements around the band at the bottom. The grey areas are overlap for you to tape together. Looking at my template from left to right. The first section is the left side of the helmet, then the back, the right side and on the right is the front piece.
- Hanging below the back section is what covers the brim of the hat.
- The Side section should be taped on the grey area, but leave the back section under it.
- Tape the side down first. The cross the 2 back sections to make an X on the inside (Cut the slit down the middle). Tape to the inside of the front section to hold them in place.
- Tape the front section to the back of the hat. This should cover the side and back pieces.
- Tape the side wings and face plates to the hat. I made these from Coroplast. The helmet is poster board.
- Spray paint grey if you could not find grey poster board. If you use grey poster board, draw details on the helmet first. If you spray paint the helmet, draw details on the helmet after it dries. You can look at Thor’s helmet online.
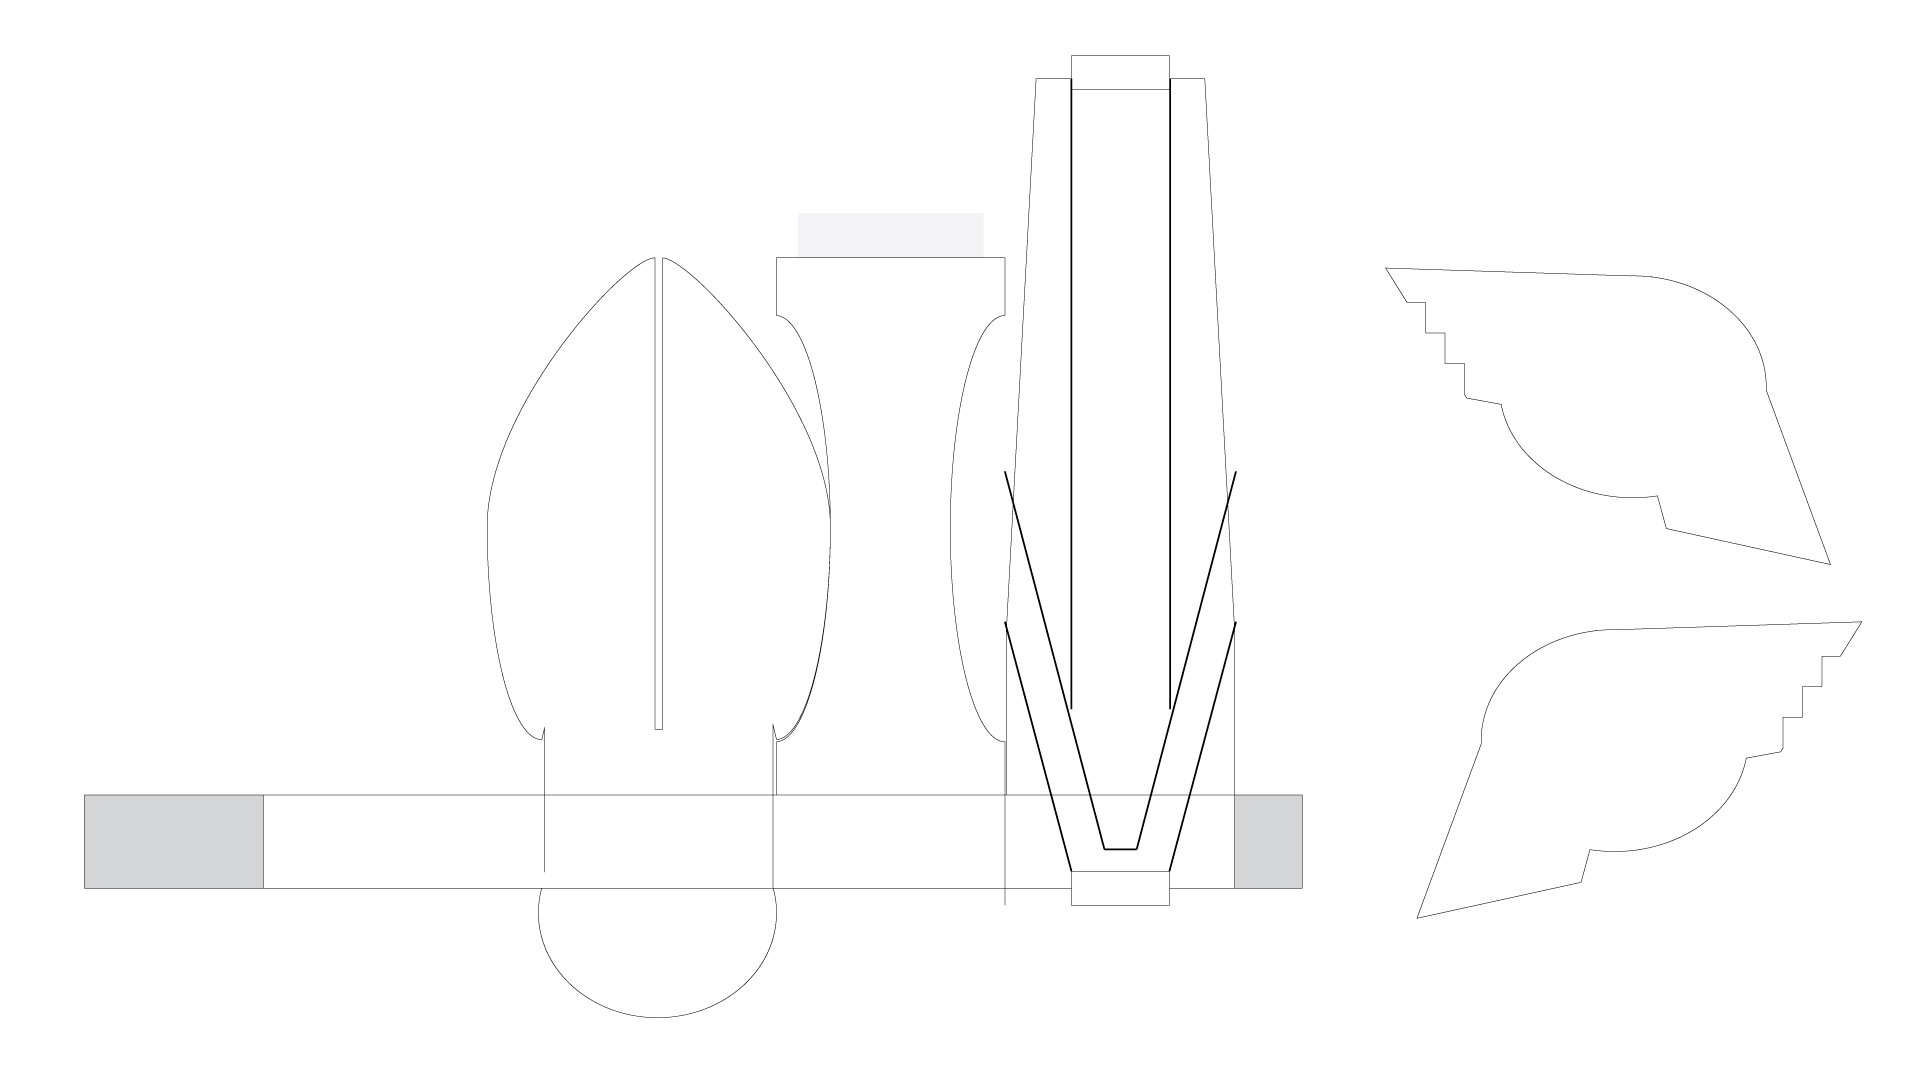
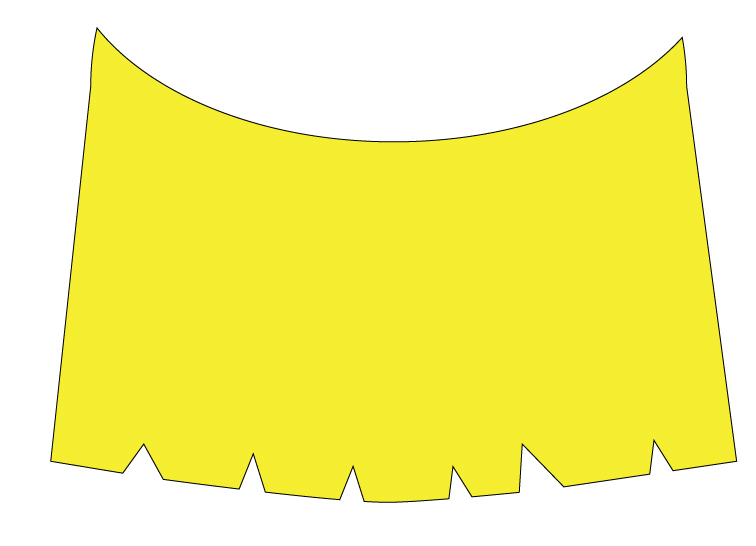
- Tape yellow hair to inside of helmet. I used this shape to the right. Trim up the desire length once you try the helmet on.
- Tape the whole helmet onto the baseball hat.
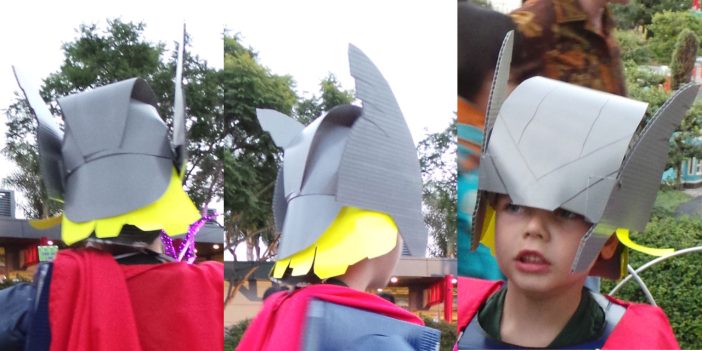
That’s it. It took me about 2 days or so to complete his LEGO Thor Costume but was well worth it. You can modify the template to make other Lego people too. Enjoy.


what a fabulous costume! LOVE!
[…] His favorite is Thor (even though he has never seen the movie – you may remember he was LEGO Thor for Halloween last […]
[…] says “Daddy, can you make me an Olaf costume next year?” Harry had made Bub’s a LEGO Thor Costume that Halloween. It was awesome. “Sure! I can totally make an Olaf costume next year […]
What a cool costume,I always think I am waaayyy more crafty than my abilities actually allow for. And even I think that I may be able to make this for my son, and at least he it turn out 75% right. Which for me is MAJOR!!
[…] Believe it or not, this is the 2nd Thor costume I made for my son. A few years ago, he won 2nd place in the Brick or Treat Costume Contest at LEGOLAND California with a LEGO Thor costume! […]
[…] in a while my hubby gets an idea to build something. Back in October Daddy made a really awesome DIY Halloween Costume that turned out to be a little more work than he anticipated. Apparently he didn’t learn […]
[…] DIY LEGO Thor […]