No Sew DIY Thor costume
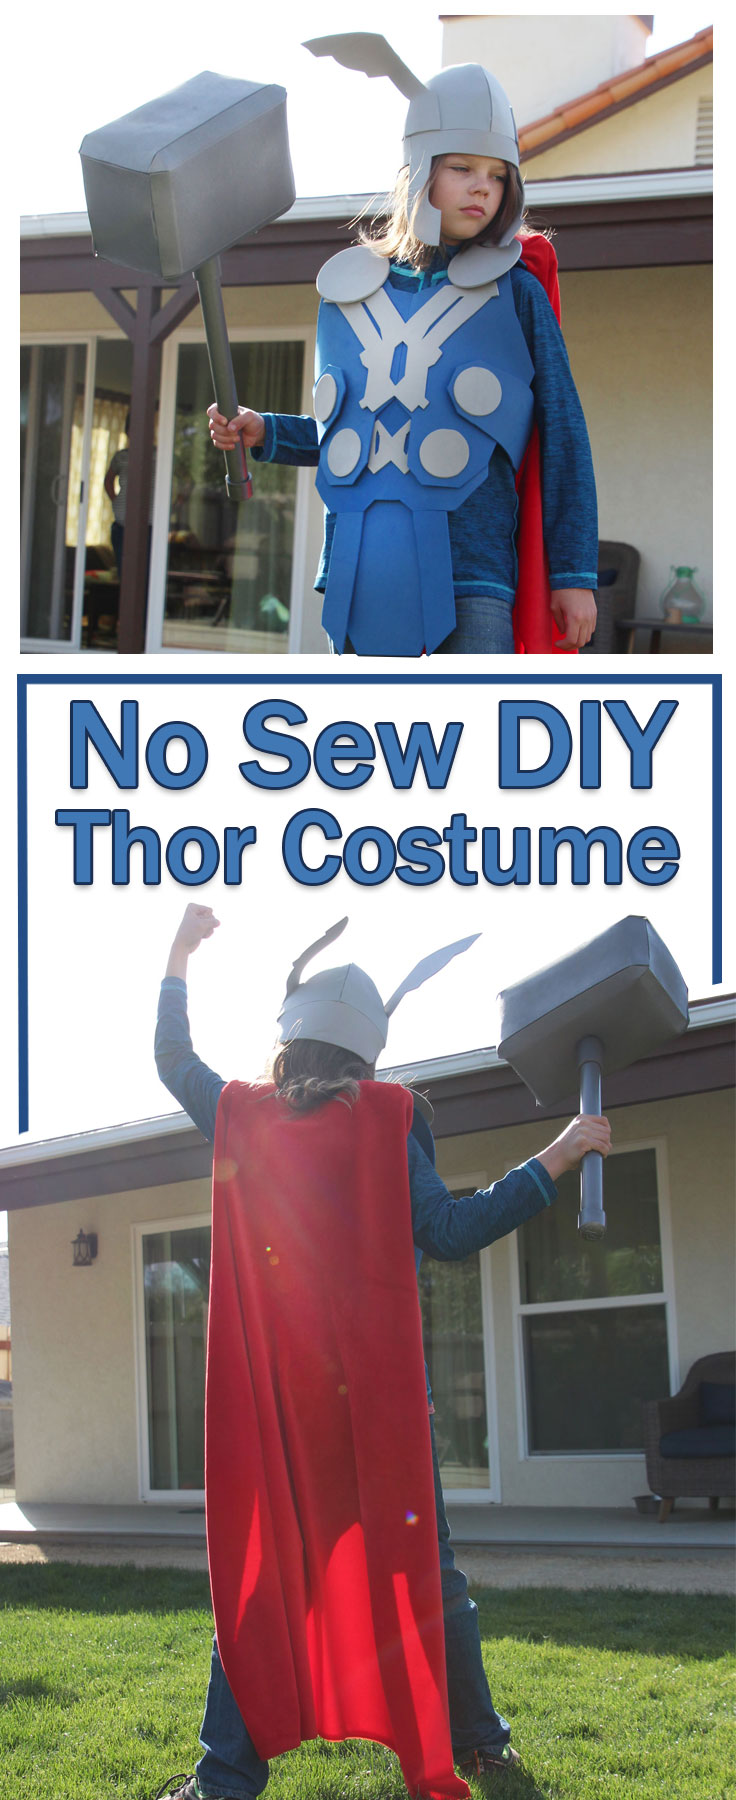
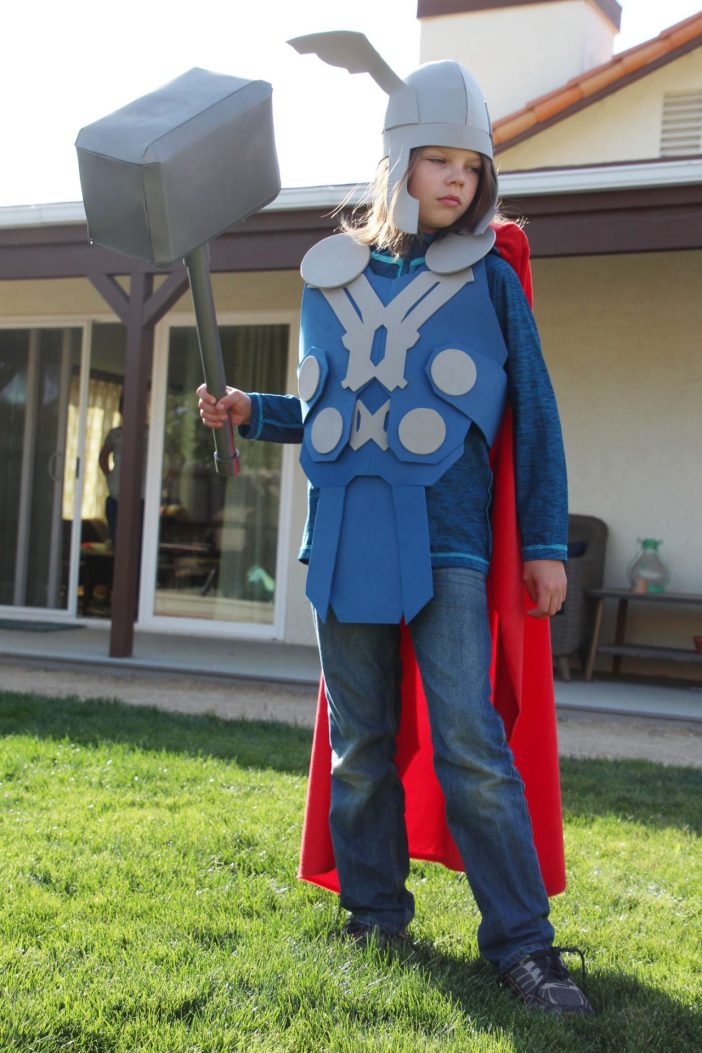
Thor is one of the most popular Avengers. With Thor Love and Thunder coming to theaters in 2022, a Thor costume is going to be a very popular costume. We have an awesome DIY No Sew Thor Costume. This Super Hero costume is easy to make and involves no sewing at all. Great for Halloween, parties, school spirit days, and even a costume to wear to Disney. Using inexpensive craft foam, PVC pipe, and a few other inexpensive products this costume is surprisingly simple to make! Learn how to make your own DIY Thor costume below. Marvel fans everywhere can make this easy costume.
Thor Love and Thunder finds Thor (Chris Hemsworth) on a journey unlike anything he’s ever faced – one of self-discovery. But his efforts are interrupted by a galactic killer known as Gorr the God Butcher (Christian Bale), who seeks the extinction of the gods. To combat the threat, Thor enlists the help of King Valkyrie (Tessa Thompson), Korg (Taika Waititi) and ex-girlfriend Jane Foster (Natalie Portman), who – to Thor’s surprise – inexplicably wields his magical hammer, Mjolnir, as the Mighty Thor. Together, they embark upon a harrowing cosmic adventure to uncover the mystery of the God Butcher’s vengeance and stop him before it’s too late. Directed by Taika Waititi (“Thor: Ragnarok,” “Jojo Rabbit”) and produced by Kevin Feige and Brad Winderbaum, “Thor: Love and Thunder” opens in U.S. theaters July 8, 2022.
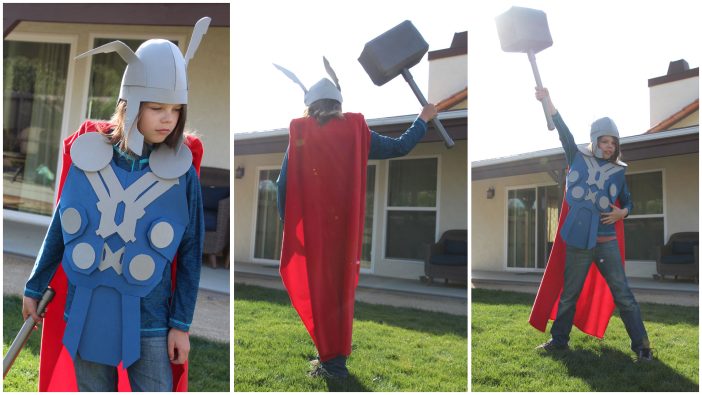 Mr. Highlights Along the Way made this costume for our son, so I will let him tell you how to make this yourself!
Here are the instruction for your No Sew DIY Thor costume. Craft foam can be found at your local hobby or art supply store. You can also purchase craft foam online from Amazon. These costumes are quick and easy to make. They may not last too many battles, but they are fun to create anyway. We have included templates and instructions. You will need to adjust the pattern to your child’s size.
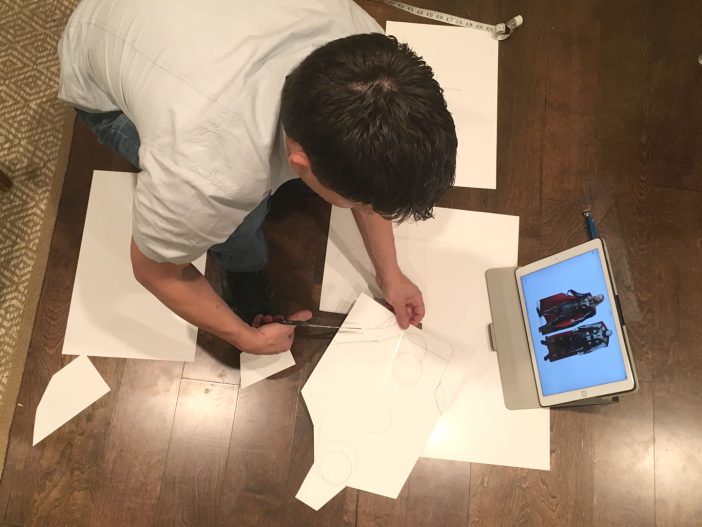
Start by finding photos of your favorite hero. We are making a Thor costume in this tutorial. You will want to create a drawing of what you want to cut out of the foam. I found it easiest to draw on 11 x 14 paper then cut them out. Tape the drawings together with packing tape. Try it on your model, and cut the design more if it doesn’t fit quite right.
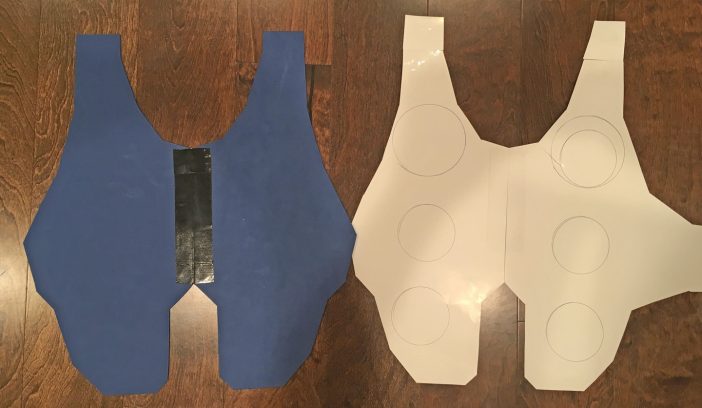
Draw half of the front armor and place two sheets together when I cut it out. This way, you get a mirror opposite that you can quickly tape together. Trace the drawing onto the foam sheet and cut out the pattern.
Use the templates below to get started on the armor or make your own. For the chest piece, tape the three layers together on the inside. To attach the grey detail pieces, use contact cement and glue them on. Be sure to check out the tips below if you are going to use contact cement. It can ruin your costume if you do not use it properly.
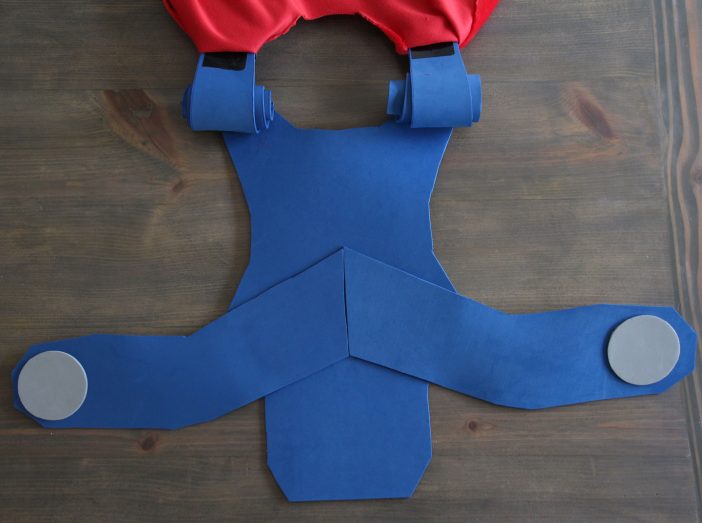
Repeat the process on the back. Cut out the back shapes and tape them back together along the center. Glue the side pieces to the back plate.Attach the back and front pieces at the shoulders using duct tape. To attach the sides of the armor together, use two long side pieces that are glued to the back. Wrap them around to the front and connect with glued on Velcro strips.
For the shoulder pads, roll up foam and tape it so it would not unroll. Next, tape them to the outside of the armor. They should be on top of the armor and will be exposed at this point. You will be attaching the cape to the shoulder pads in the next step. For the Cape, measure and cut your cape to length. Cut out the neck area on the cape. Wrap each side around the shoulder pads and safety pin in place. You can sew the edges if you want to but that will only delay the process.
Time to suit up. Place the costume over your child’s head. Use the Velcro adhesive strips to the inside of the side pieces. Wrap them around to the font and Velcro in place.
Here are the paper templates I used. Most of these will fit on a single foam sheet.
Tips for putting together your No Sew DIY Costume made with craft foam.
Duct tape sticks really well to craft foam. Its also the fastest way to put these together. Tape on the inside so you don’t see the duct tape. For other parts, you may need to glue it together. Use contact cement for these areas. Be sure to use contact cement outdoors or a well ventilated area. Add a thin coat of cement. Let it air dry for a minute or more. It starts out a murky yellow color but starts to dry clear. When it starts to turn clear, place it where you want to glue it. Add a heavy book to hold it in place for 10-15 minutes. Contact cement does create a reaction with the foam and should only be done by an adult. If you do not add a weight on it. The foam will curl up with the heat of the reaction.
For fabric, like the cape in our design, add a piece of duct tape for support on the inside of where you need to connect it. Use a safety pin to attach the fabric to your super suit.
Thor’s Hammer made from craft foam, duct tape and PCV pipes
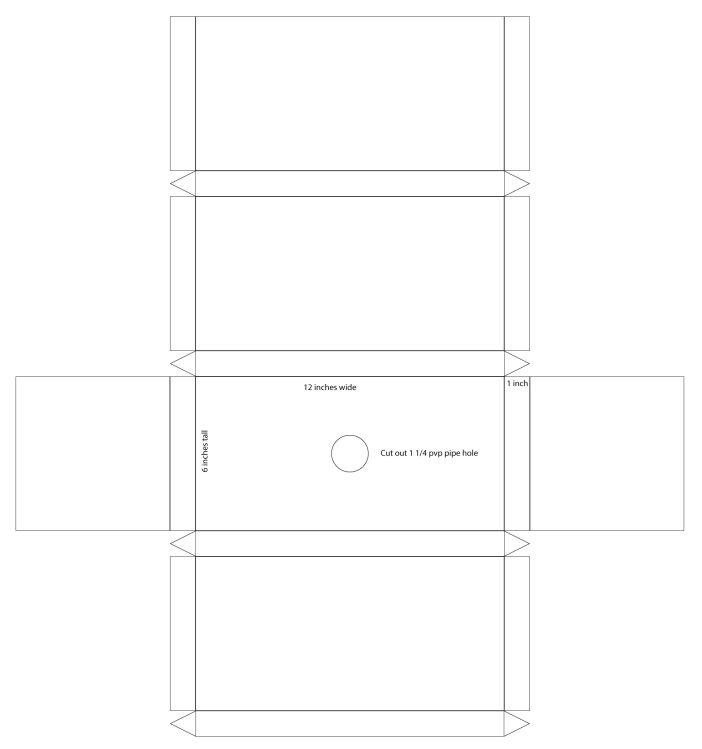
Using the Hammer template below, cut out all the pieces. You can use the template as your guide or make your own paper template. Cut out the shapes, then using a ruler or other blunt thin object, crease the fold lines. The foam will keep its shape better if you crease the fold lines. Before you begin taping, be sure to cut out the hole for the handle. Trace the PVC and use an Exacto knife to cut a perfect hole out. Using duct tape, tape the side together to make a rectangular block with open ends. Feed in your handle. I used leftover sprinkler PCV pipes for the handle and spray painted them. Use a coupling for an added detail if you have one. Tape the pipe in place. Attach it to the top and bottom of the Hammer. Reaching in, tape one end of the hammer closed. Repeat on the other end. The last seam is the hardest. Use smaller pieces of tape of you are struggling with closing it off.
Below is the template I used for Thor’s hammer. You will need to separate it out into several sheets of craft foam and tape them together. Remember to crease the fold by using a ruler on edge. Use this as a guide and adjust as you see fit. The main pieces are 12 inches wide and 6 inches tall. The edges are 1 inch wide. Adjust the PCV hole to the size of PVC you are using.
Thor’s Helmet
The helmet is the toughest for this costume. Use the template below for your DIY no sew Thor’s helmet. Measure the circumference of your child’s head just above the eyebrows. This template is 22 inches around. You will need to enlarge or reduce the template to your measurement. Make the helmet 1 -2 inches larger than your child’s head size. Take your time taping this together and use a lot of tape. The helmet will want to pull apart more than the costume. For a more permanent solution tape it from the outside. Then, cut 2 inch by 4 inch strips of foam. Using the contact cement, glue the strips on the inside of the helmet. Once its dry, remove the tape from the outside. You may still need to add tape on the inside if you dont cement the entire seams. Add the wings last once the helmet is assembled. Glue them on using your contact cement.
Here is a shopping list to get you started……


You are going to look so cool, you should probably wear your costume when you go to see the movie!
Believe it or not, this is the 2nd Thor costume I made for my son. A few years ago, he won 2nd place in the Brick or Treat Costume Contest at LEGOLAND California with a LEGO Thor costume!
Be sure to check out all of DIY costumes at https://highlightsalongtheway.com/costumes/
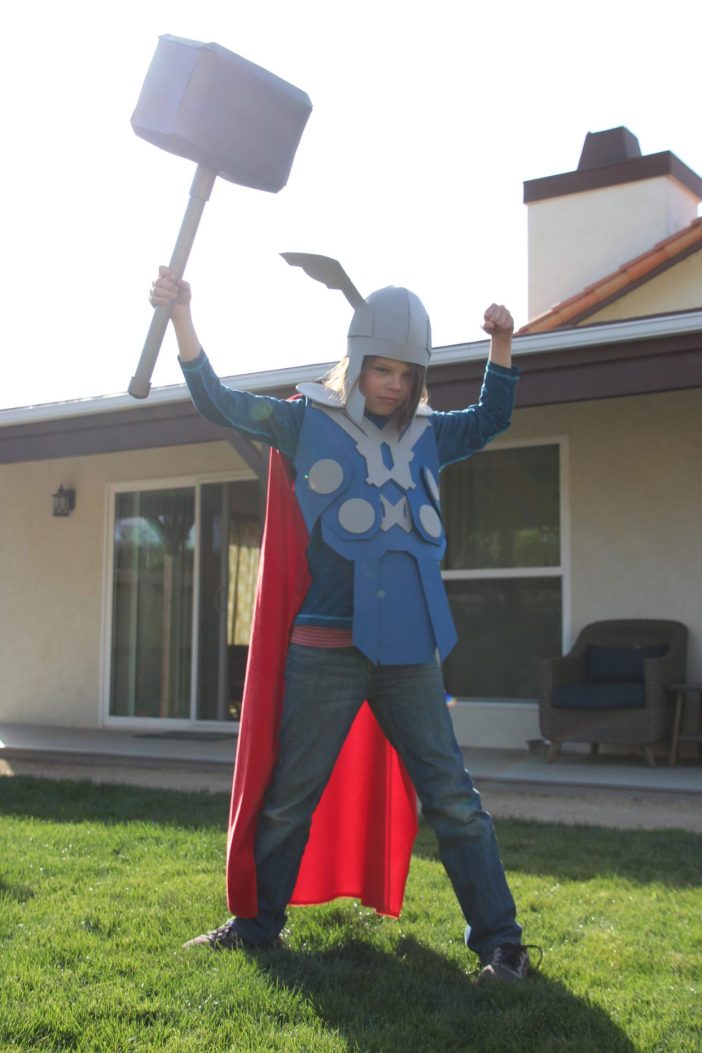



I love the Thor costume. It is so much fun for kids to dress up in a costume to a hero they identify with.
Very cool costume, and your son look quite like Thor! I love the picture with his serious God of Thunder look. This would be fun to make. Love the hammer!
This is so neat! My son would love this! Great idea
can you send the pattern as pdf?
I can see if he still has it and can make it a downloadable pdf – thanks!
[…] Thor Costume – by Highlights Along the Way […]
[…] Photo: highlightsalongtheway.com […]
[…] No sew Thor costume from Highlights Along The Way […]
I love these but I cannot view any of the patterns, can you help or are able to email to me?
Thanks!
[…] highlightsalongtheway […]
[…] NO SEW DIY Thor Costume (Made with Craft foam!) […]